DevResults uses Results Frameworks to organize indicators into hierarchies of results. Some organizations use other terms for a results framework, like 'logframe'. Some might call their results 'goals', 'objectives' or 'sub-objectives'. The overall idea is the same: a results framework allows a set of results to be organized into a hierarchy, and indicators measure progress toward one or more results.
- Add a result to a framework
- Edit a result in a framework
- Delete a result from a framework
- Create a new results framework
- Delete a results framework
- Assign an indicator to a result
- Understanding the details page for a result
- Visualizing a results framework
Add a result to a framework
Click in the Click to add box to begin entering your new result.
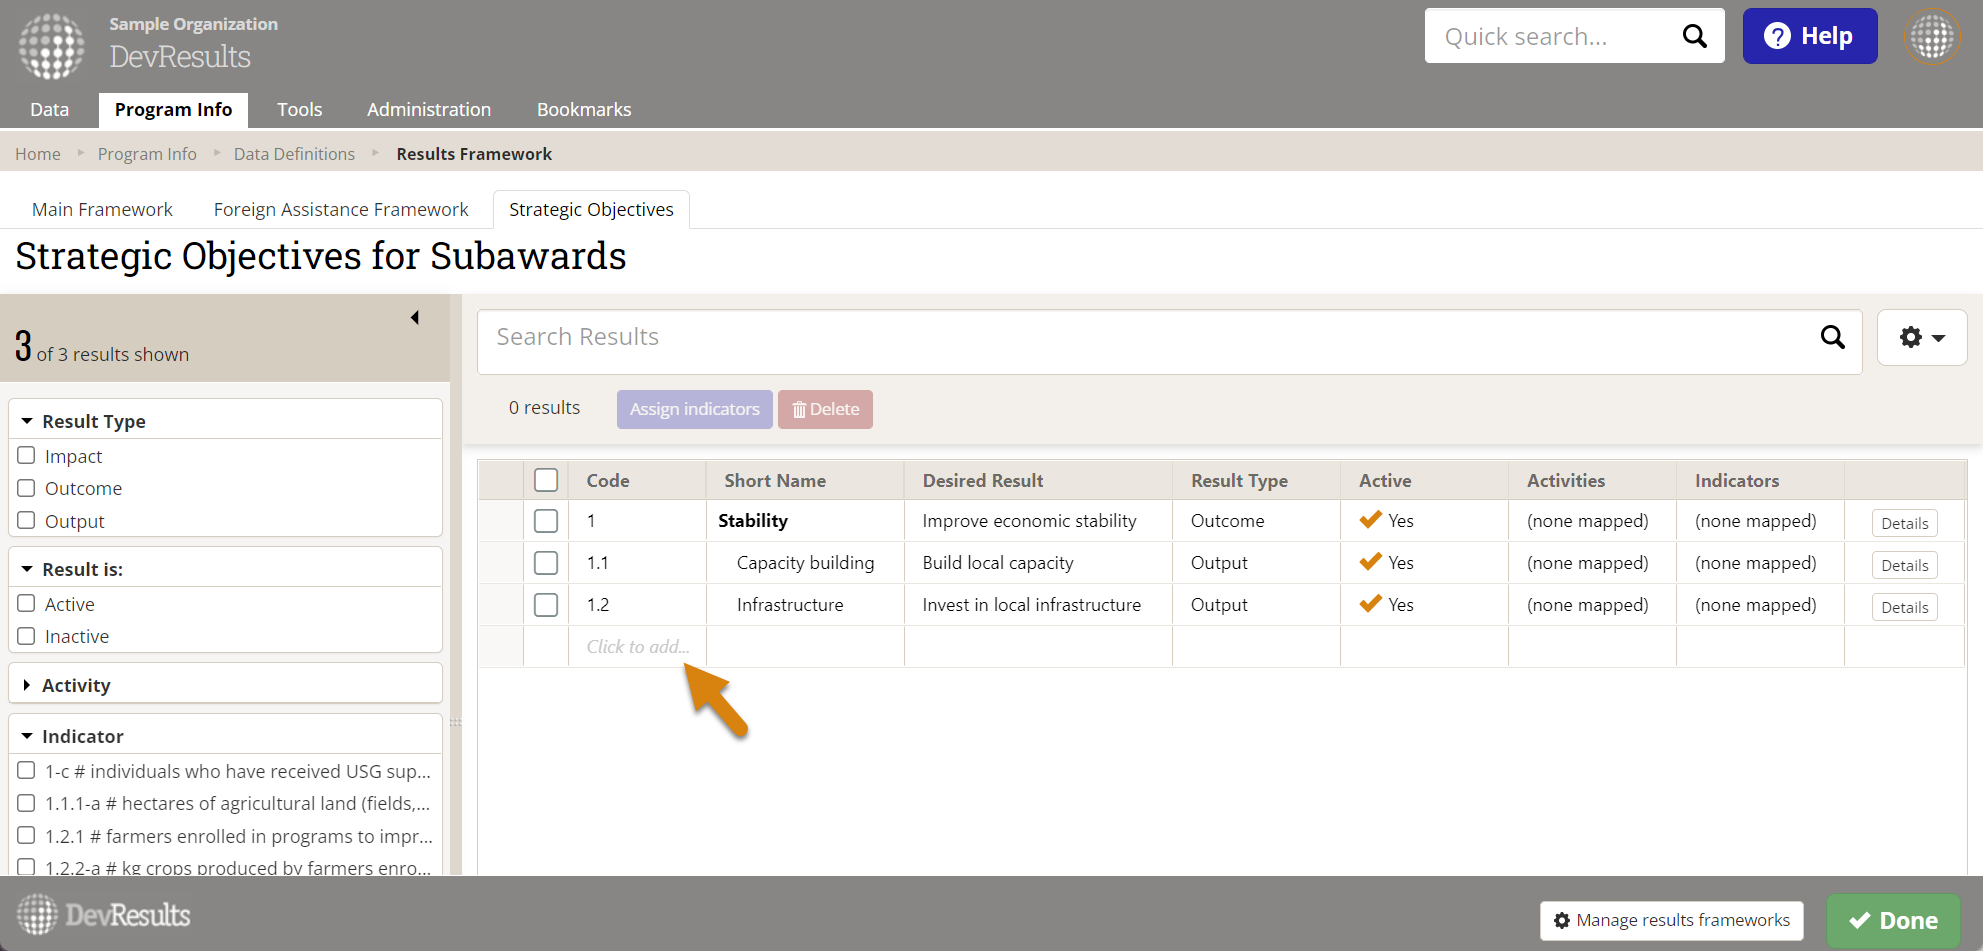
Code and Short Name are displayed throughout DevResults where ever you can filter information by results framework, such as the indicator index or the MultiMatrix reporting tool. Desired Result is a description field where you can put the full text of your framework's result (as it might appear in a logframe, PMP, etc.)
By default, all results are marked as Active when you create them. You can deactivate results by unchecking this box, which makes them unavailable as options when assigning an indicator to frameworks.
There are a few things to know about Codes and Short Names:
- Code is used to hierarchically organize the results in a framework. The periods in the code are used to denote hierarchy, e.g. result 1.1 is displayed under result 1; result A.2.5 is displayed under A.2. You can add results in any order and they will sort themselves hierarchically and alphabetically based on the code.
- Code should be unique within the Results Framework, but you can use the same codes across different Results Frameworks.
- Code can contain only numbers, letters, dashes, and periods.
- Short Names do not have to be unique, but it is recommended. This will make it easier for people less familiar with the framework to find things they need.
You can also add new results in bulk using an Excel template. To download the template, click on the gear icon and select Download Blank Template.
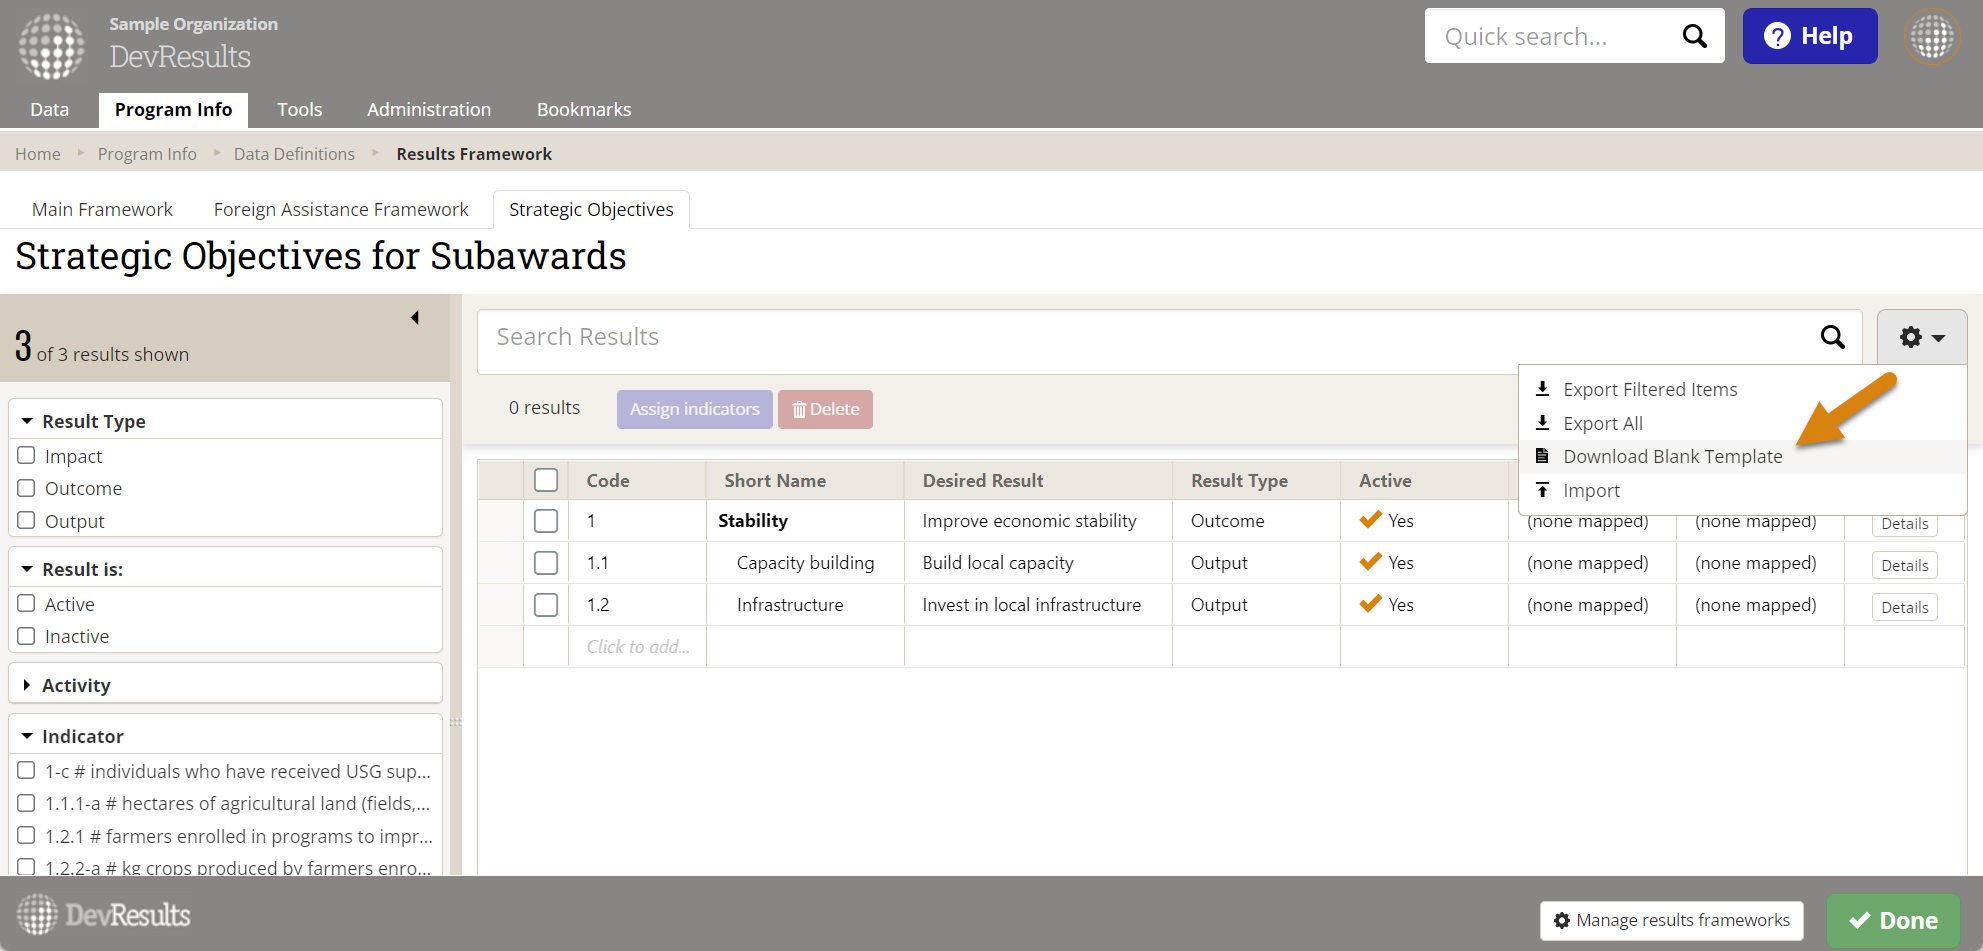
Once the template downloads, open and populate it in Excel. Be sure to save the file when you're done editing!

After you've saved the file, go back to the same gear icon menu and now select Import. The pop-up window will prompt you to choose (or drag and drop) the file you just saved. Once uploaded, you will either see a list of validation warnings for errors that need to be corrected, or you will see a green check and message letting you know that all of the new content is ready to import. From here, you can either click Continue to proceed, or you can click Clear upload to start over.
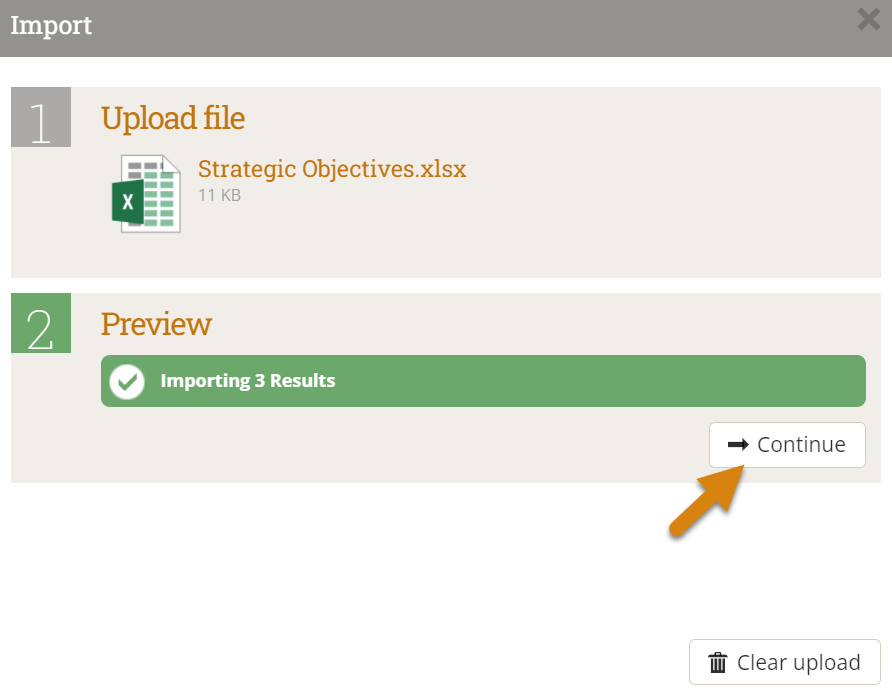
If the import succeeded, you'll see another confirmation message letting you know that all new results were imported successfully.
Edit a result in a framework
To edit a result in a results framework, click on the result's code, short name, or desired result, and type to edit. You can also change the Result Type or toggle things like Active (Yes/No) from this screen. (See the section below on assigning an indicator to a result for more information on how to edit mapped projects and Indicators).
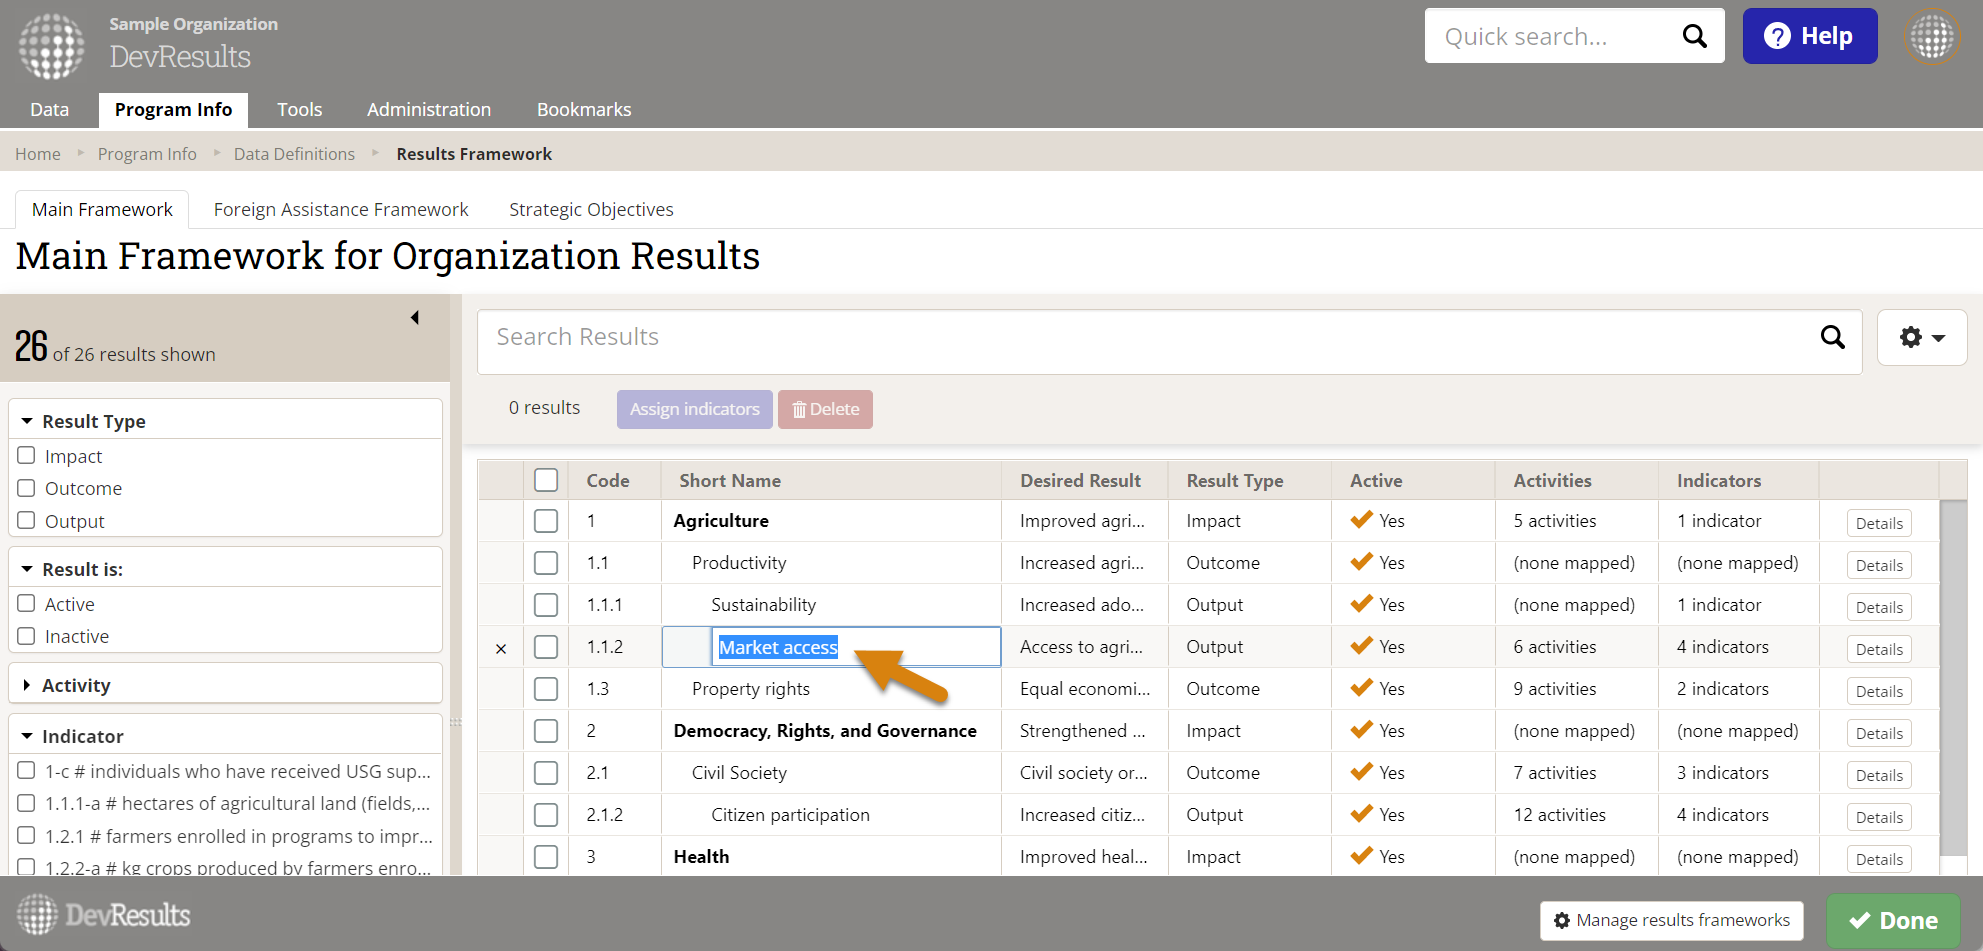
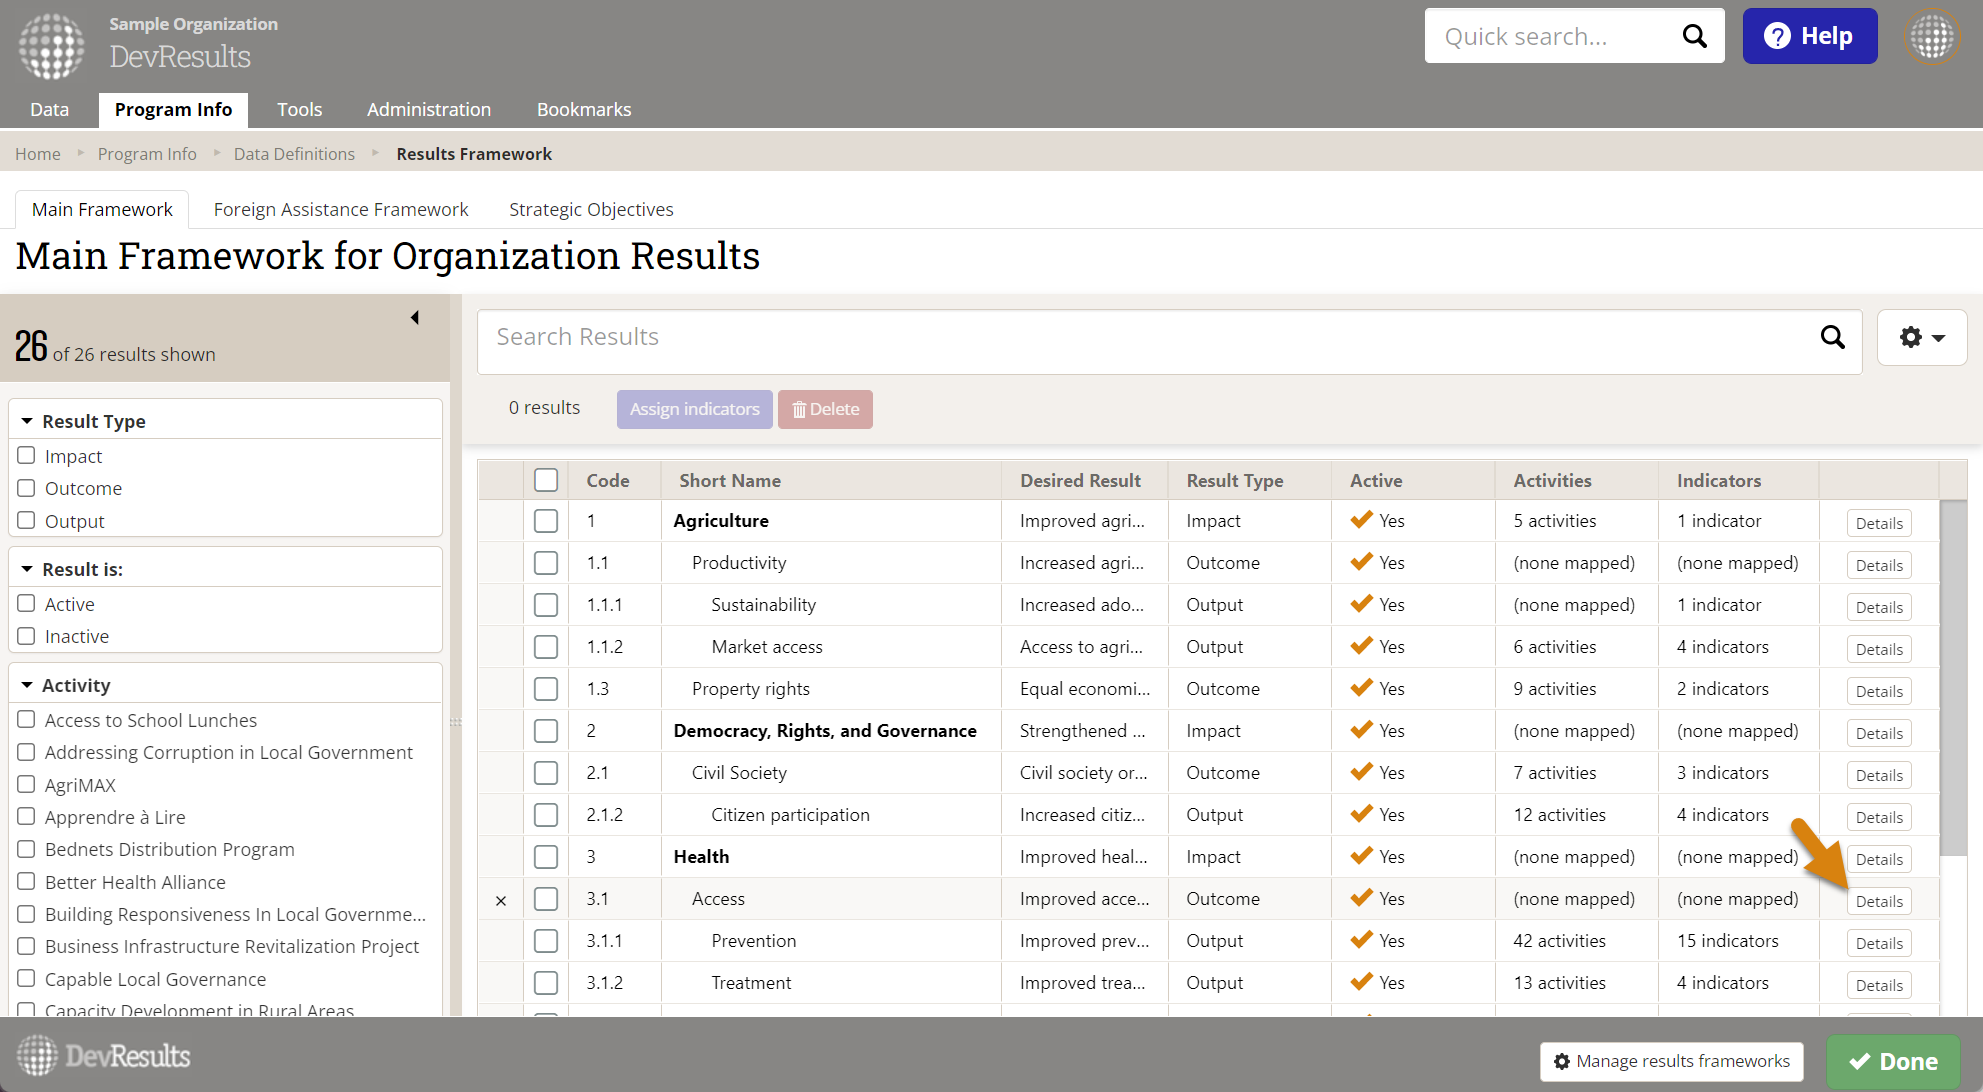
You can also make these changes and others by opening the details window, just click on the Details button to the right.
Note: Changing the code, short name, or desired result for a result will not affect the indicators assigned to the result in any way.
To make bulk edits to many results at the same time, you'll need to download an export of your current results and import your edits. You can choose to either Export All results from the entire framework from the gear icon menu, or add one or more filters and Export Filtered Items only.
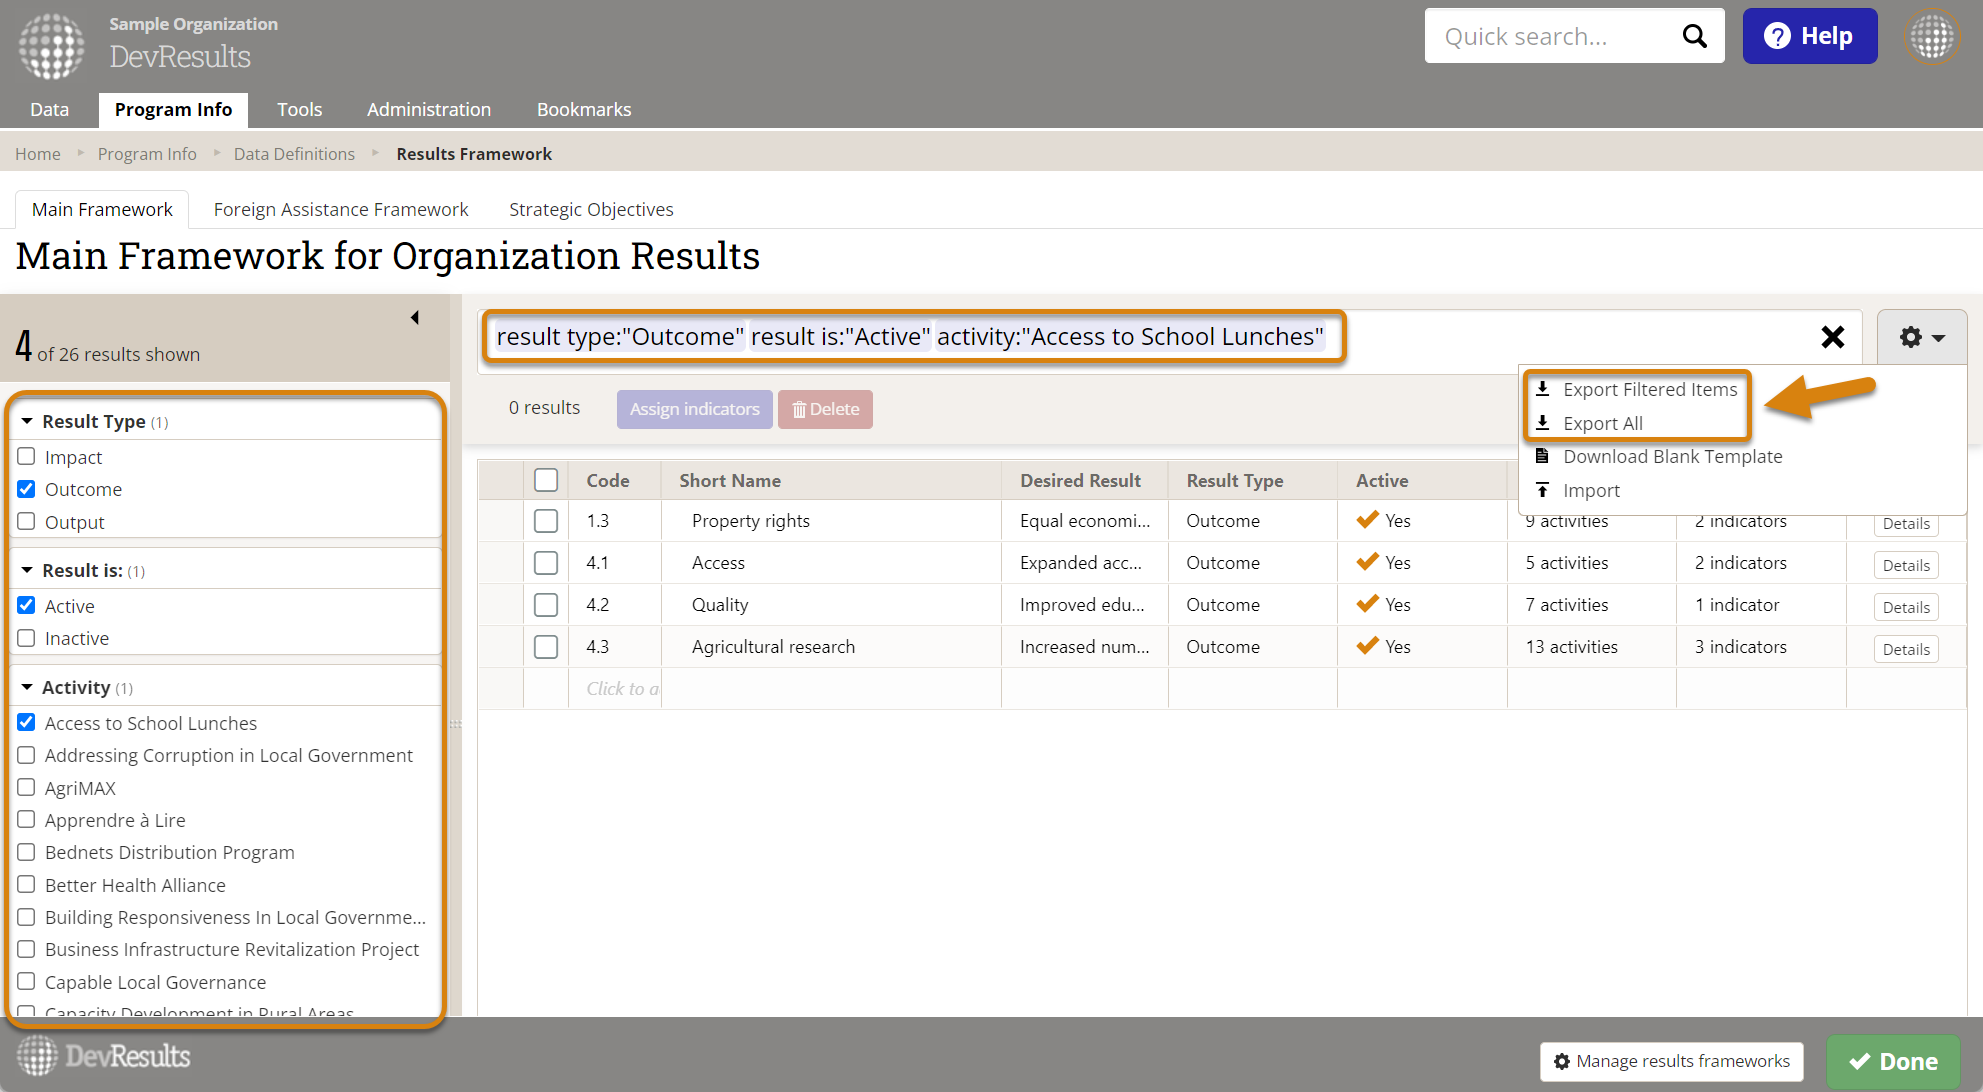
Open the Excel file and make changes as needed. Be sure to save the file when you're done editing!
Note: To edit existing results, do not delete or change the resultID. This is the only way the system knows which result should be updated.

After you've saved the file, go back to the same gear icon menu and now select Import. The pop-up window will prompt you to choose (or drag and drop) the file you just saved. Once uploaded, you will either see a list of validation warnings for errors that need to be corrected, or you will see a green check and message letting you know that all of the new content is ready to import. From here, you can either click Continue to proceed, or you can click Clear upload to start over.

If the import succeeded, you'll see another confirmation message letting you know that all new results were imported successfully.
Delete a result from a framework
To delete a result from a results framework, click on the X next to the result. If indicators were assigned to the result, those assignments will be removed, but the indicators and any associated data will remain unchanged.
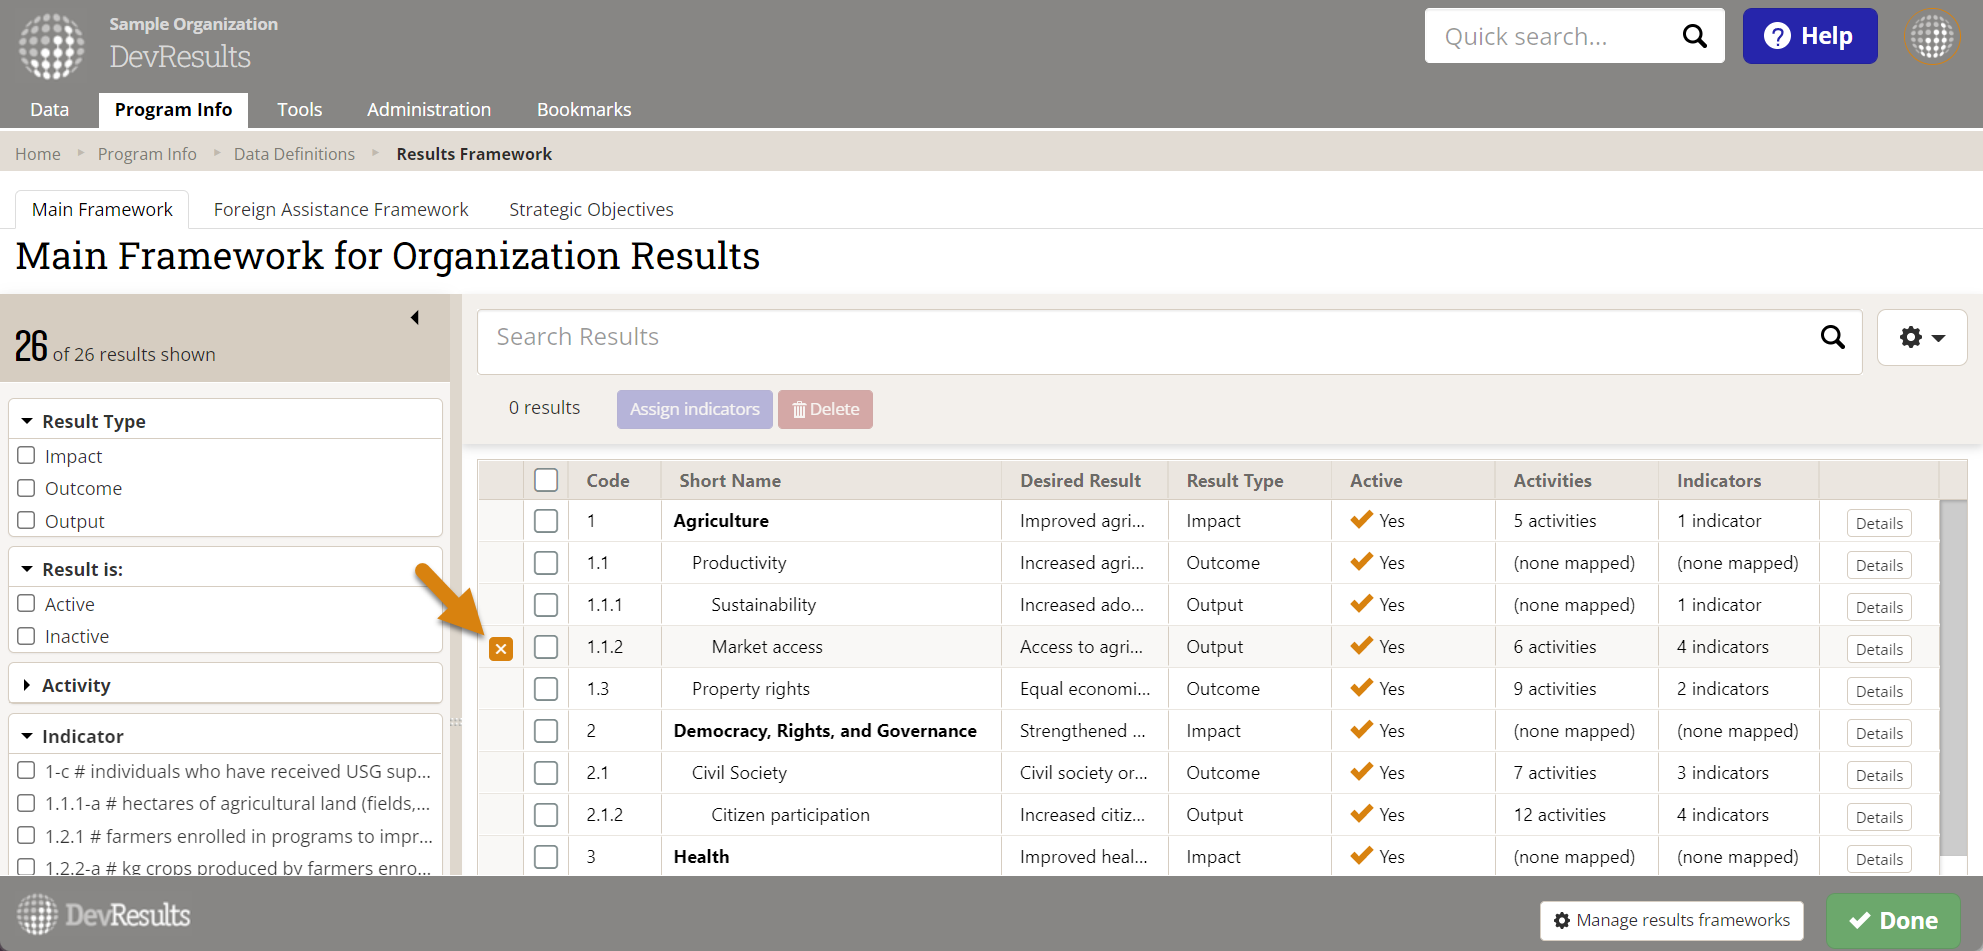
You can also delete multiple results in bulk by checking the boxes next to each result and clicking the red Delete button at the top.
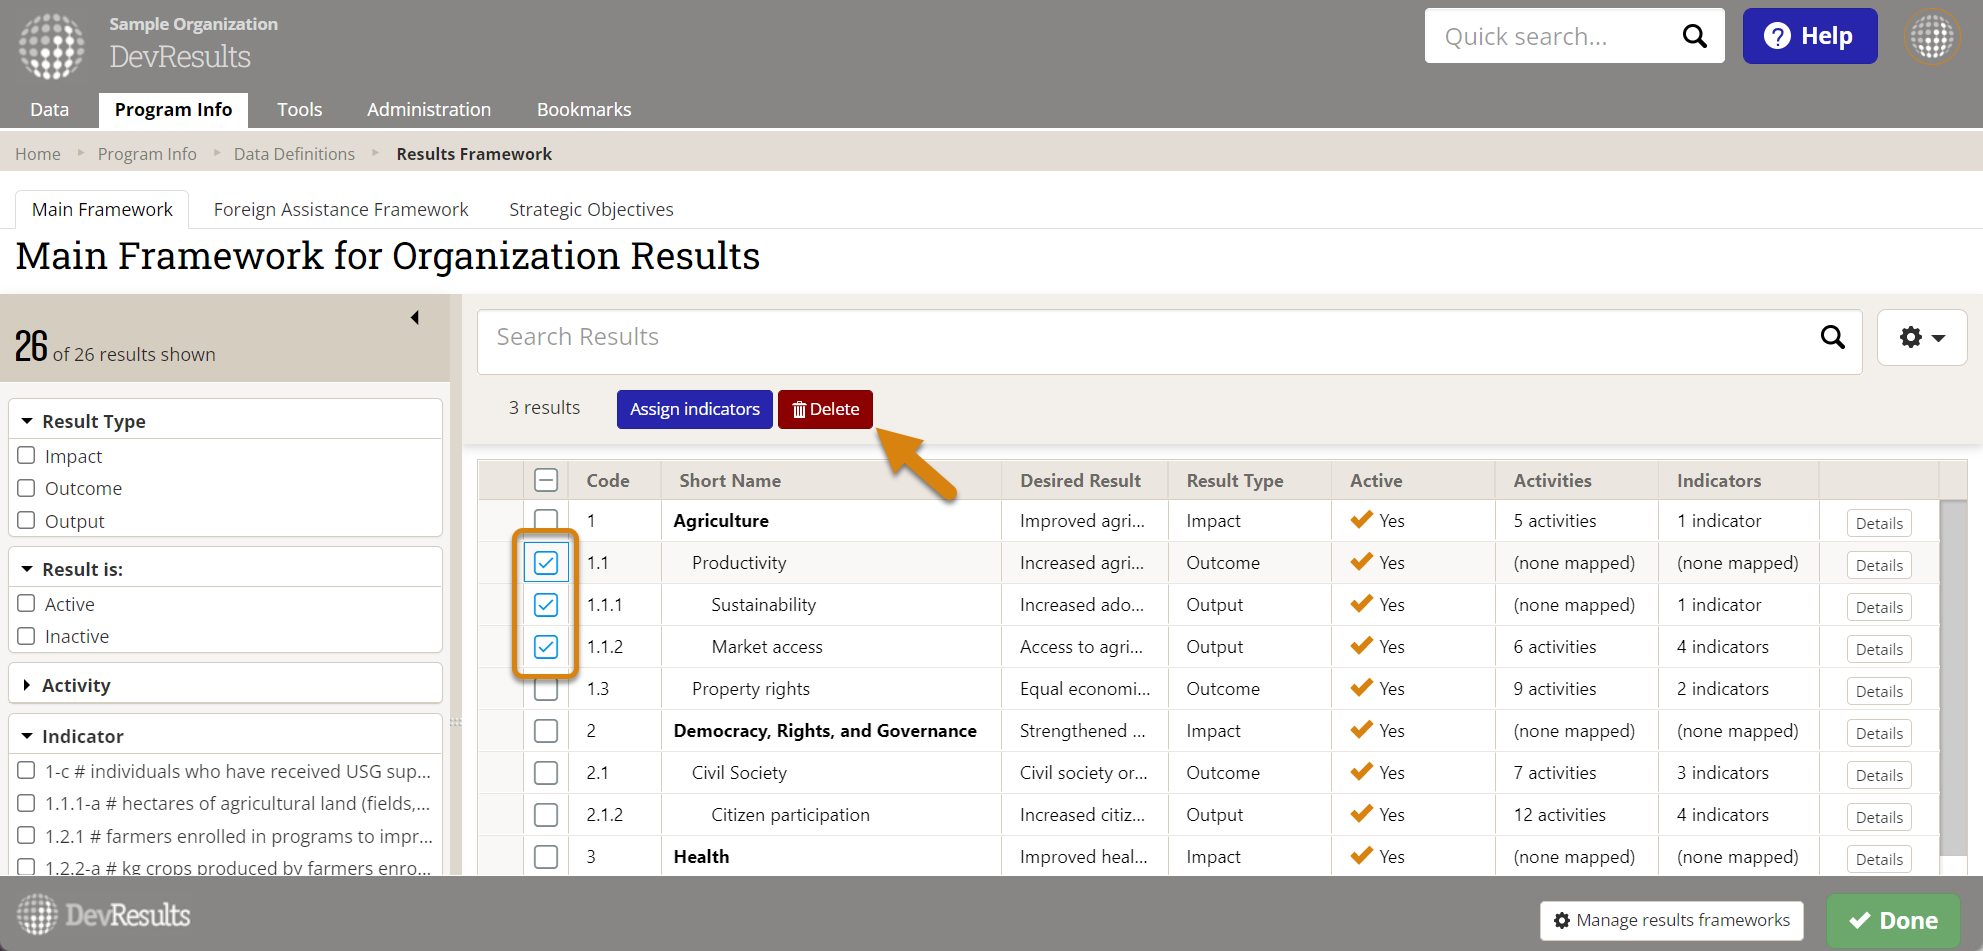
Note: Deleting a result will not affect the indicator data in any way; the deleted result will simply be de-linked from any mapped indicators and projects.
Create a new results framework
To create a new results framework, go to Program Info > Results Framework.
Existing results frameworks will be displayed in tabs along the top. To create a new results framework, click the Manage results frameworks button in the lower right.
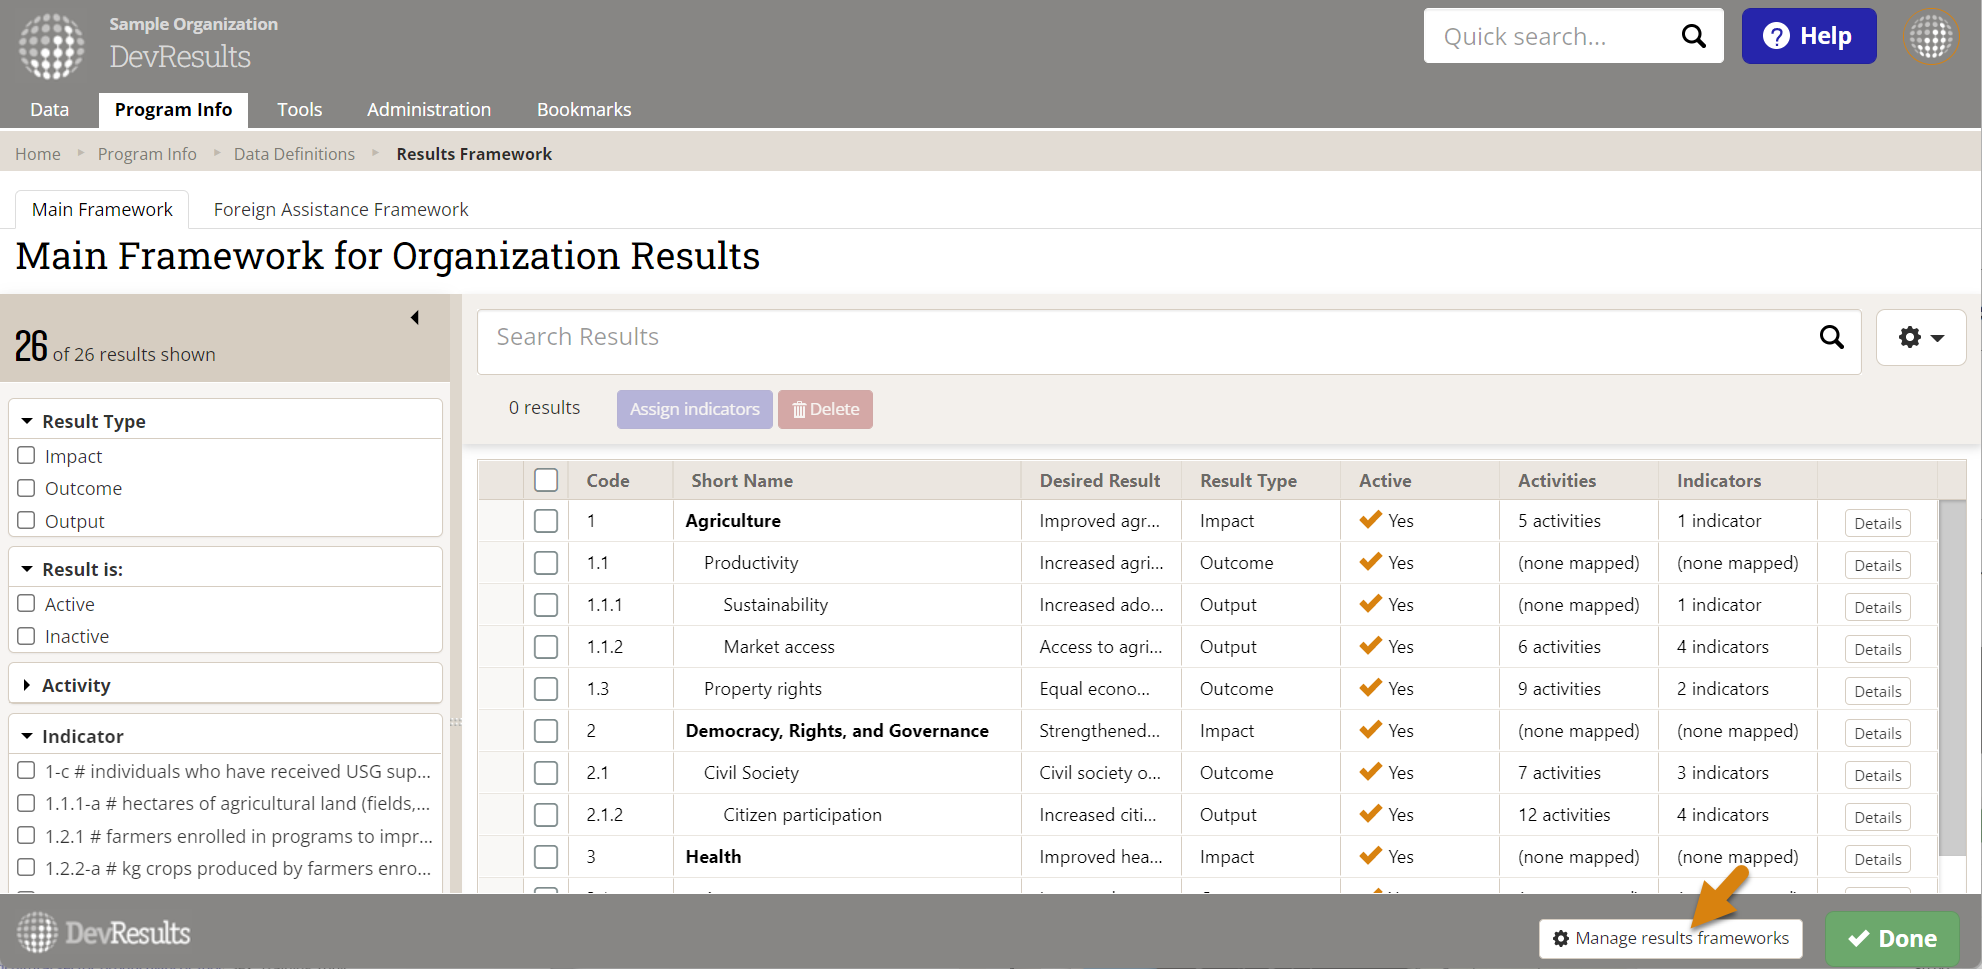
This will open a pop-up displaying the existing frameworks. To add a new one, click in the empty cell where it says Click to add, and fill out the Code Prefix, the Short Name, and (optionally) the Description.

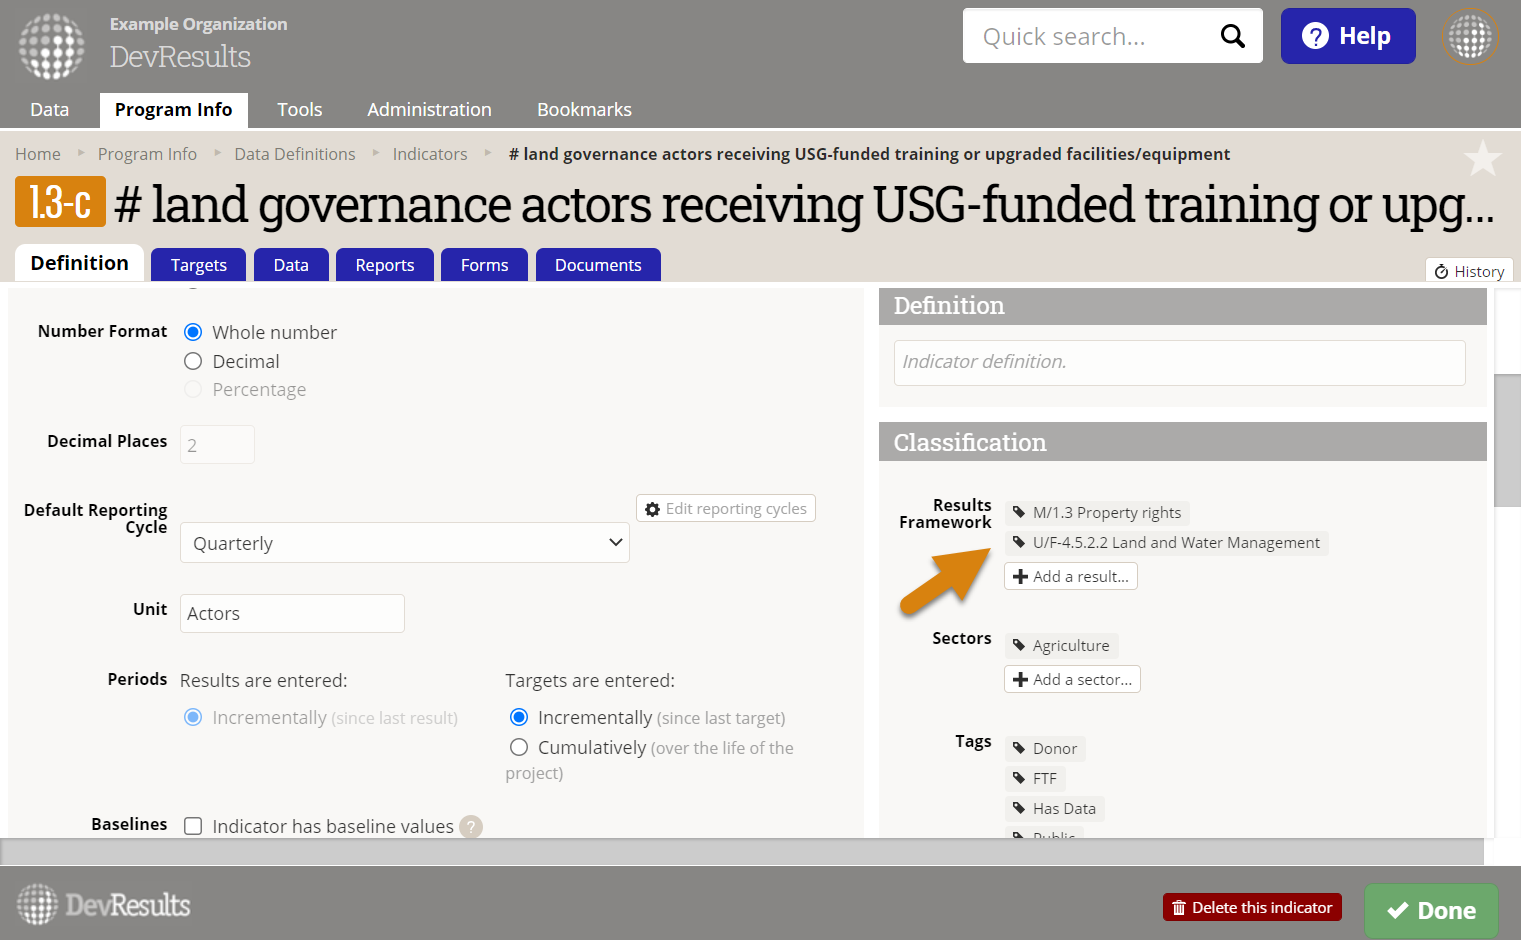
The Code Prefix is used on indicator definition tabs in the classification section. Here, results from the "M" framework (Main Framework) and "U" framework (Foreign Assistance Framework) are assigned to the indicator.
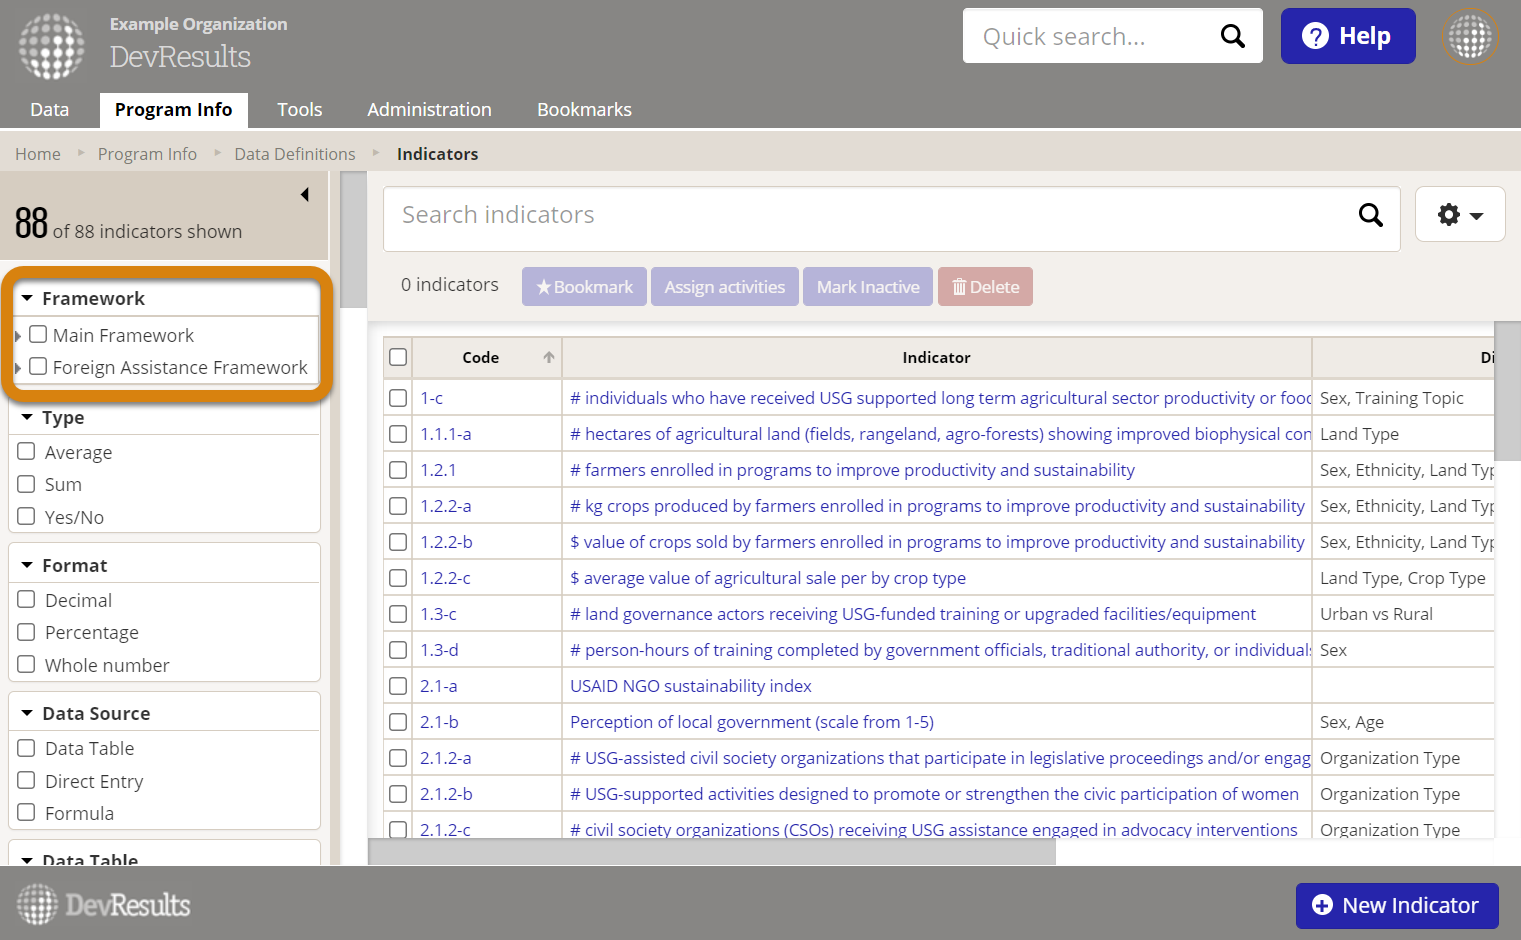
The Short Name is used anywhere you can filter indicators by results framework, like the indicator index page.
The Description allows you to provide a description of the results framework and is only accessible from this Manage Results Frameworks view.
The order of the results frameworks in this pop-up determines the order for the results frameworks across the site. To reorder, click and drag the arrow to the left of the Code Prefix for the framework you want to move.
Once you've entered values for Code Prefix, Short Name, and Description, click the Done button in the lower right of the pop-up.
This will take you back to the tabbed view. Click the tab of the framework you just added.
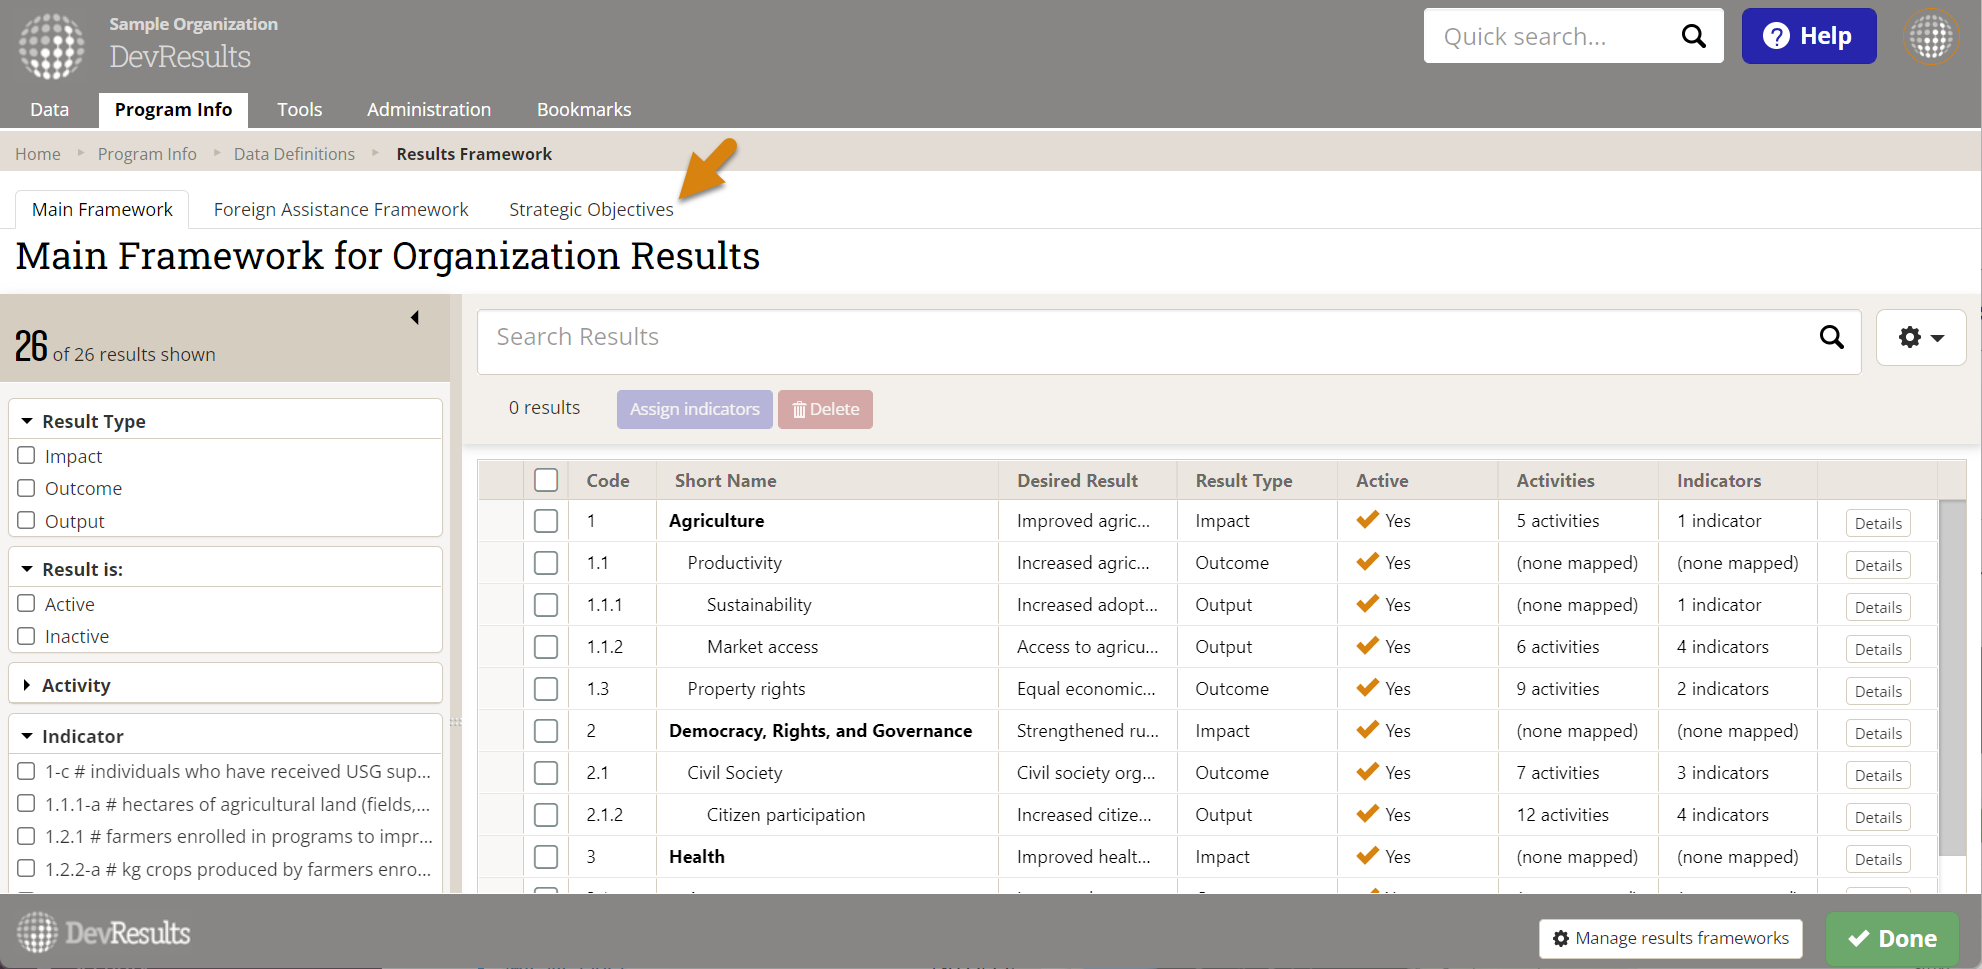
This will open an empty grid for you to enter the results for your new results framework.

Next, jump to how to add a result to a results framework.
Assign an indicator to a result
To assign indicators to a result, click the Details button to the right of the results. This will open the result details pop-up window.
In the Indicators section, if any indicators are already assigned to the result, you will see them in a list here.
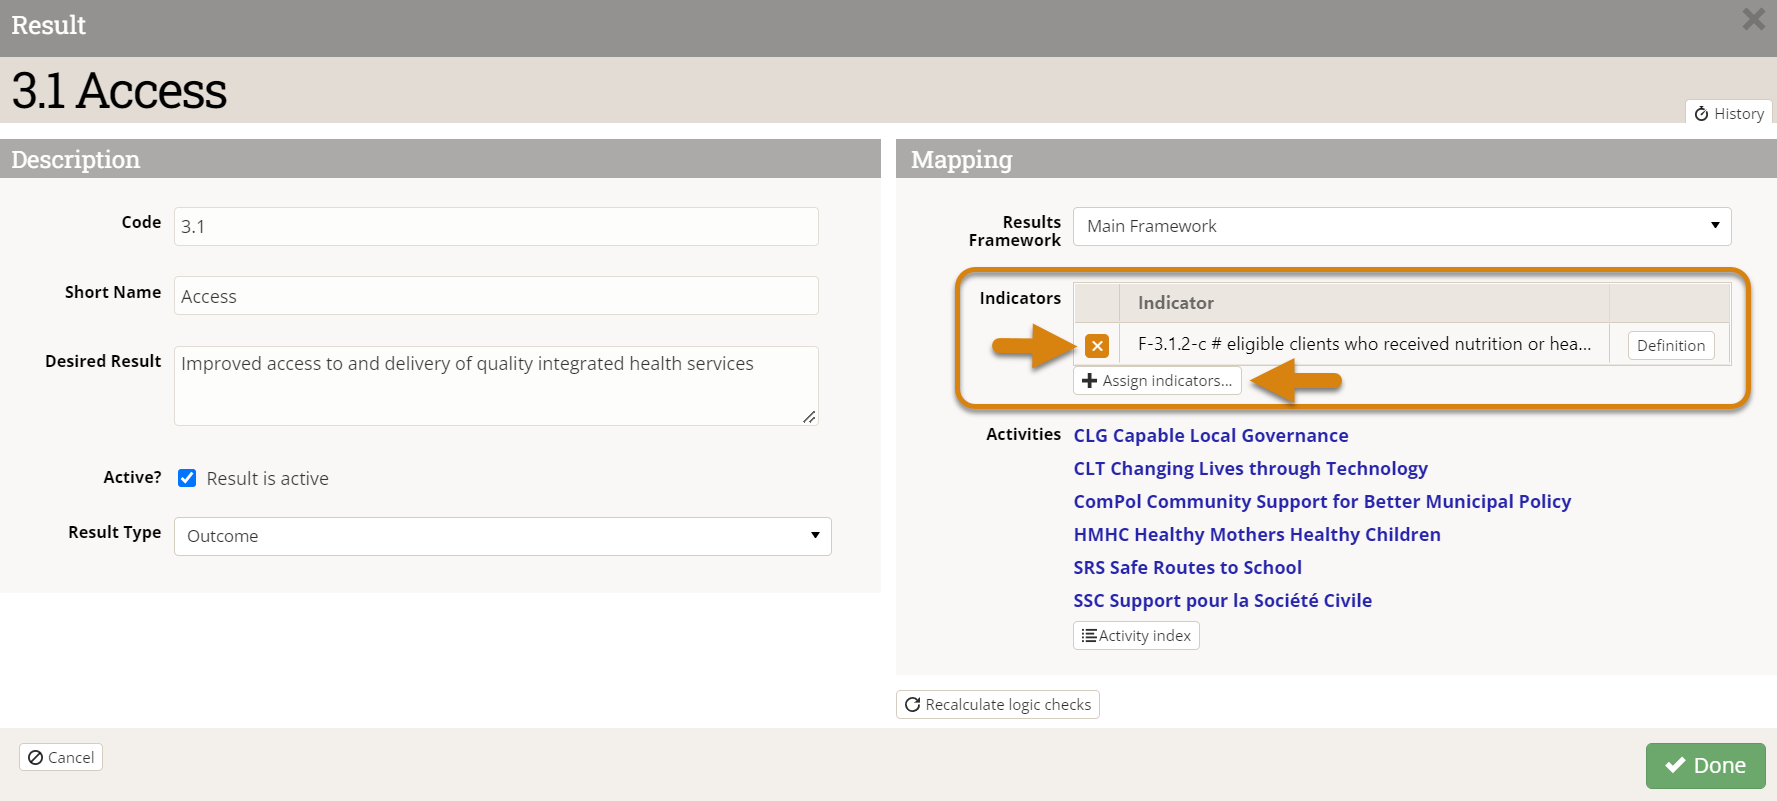
To remove an indicator assignment, click on the X button to the left of the indicator.
To add more assignments, click on the + Assign indicators... button to see a full index of all your indicators. Use the filter and search tools to narrow the list of potential indicators, click to check indicators you wish to assign to your result, and click the green Assign button to finalize your selection.
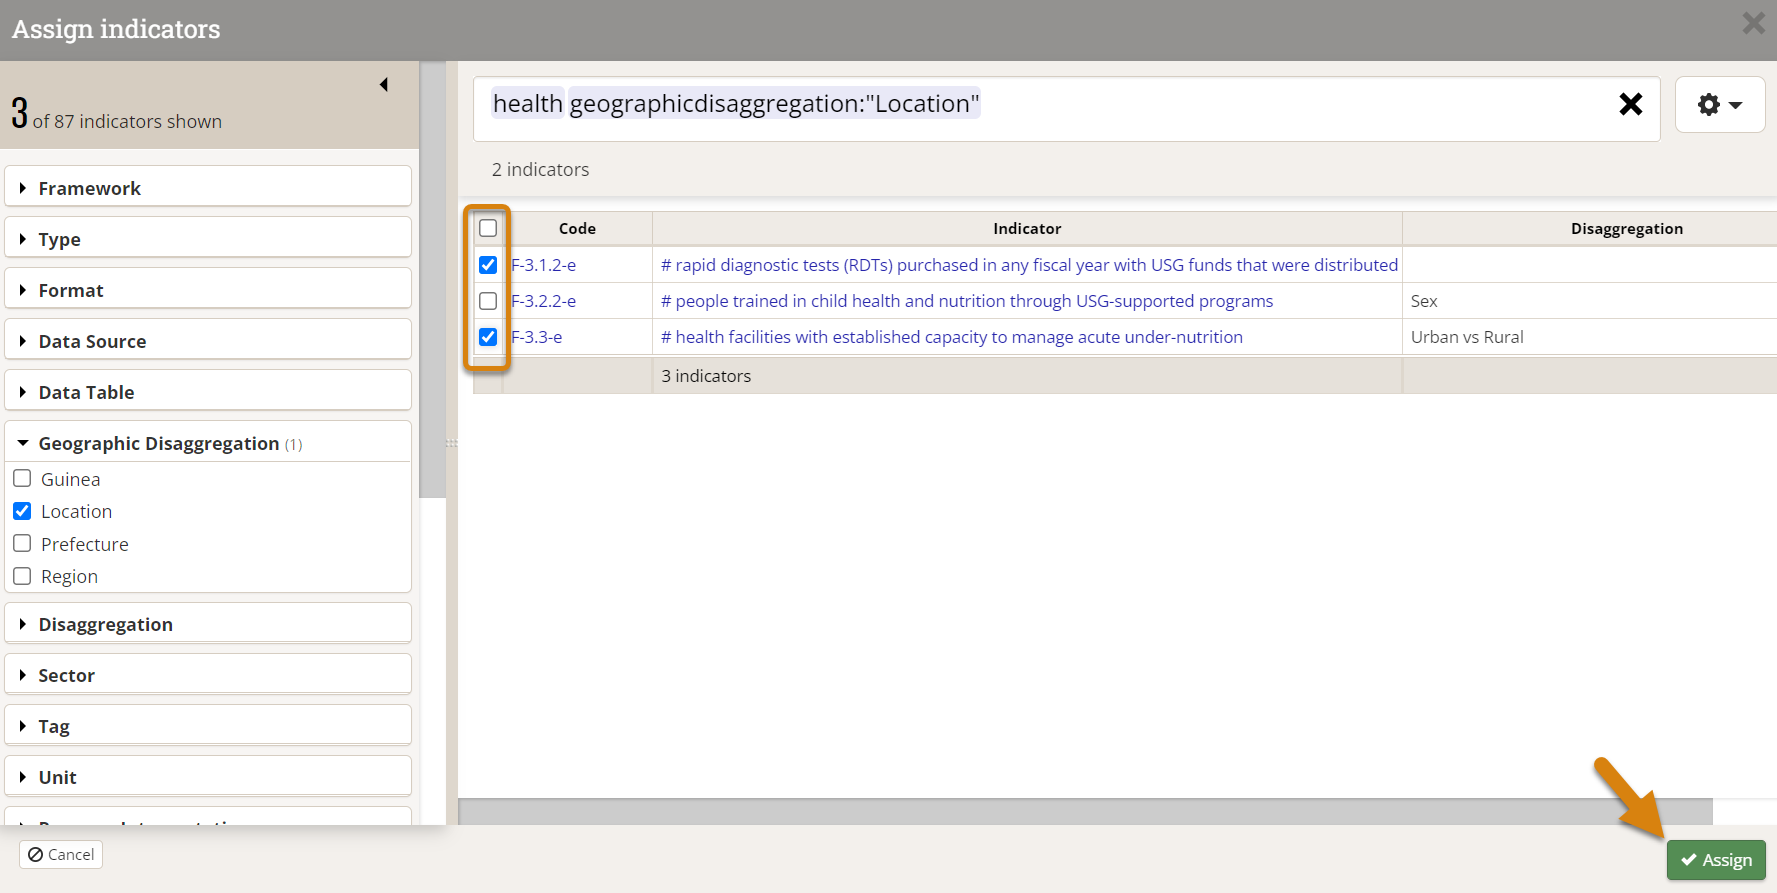
These assignments can also be managed on each indicator's definition page.
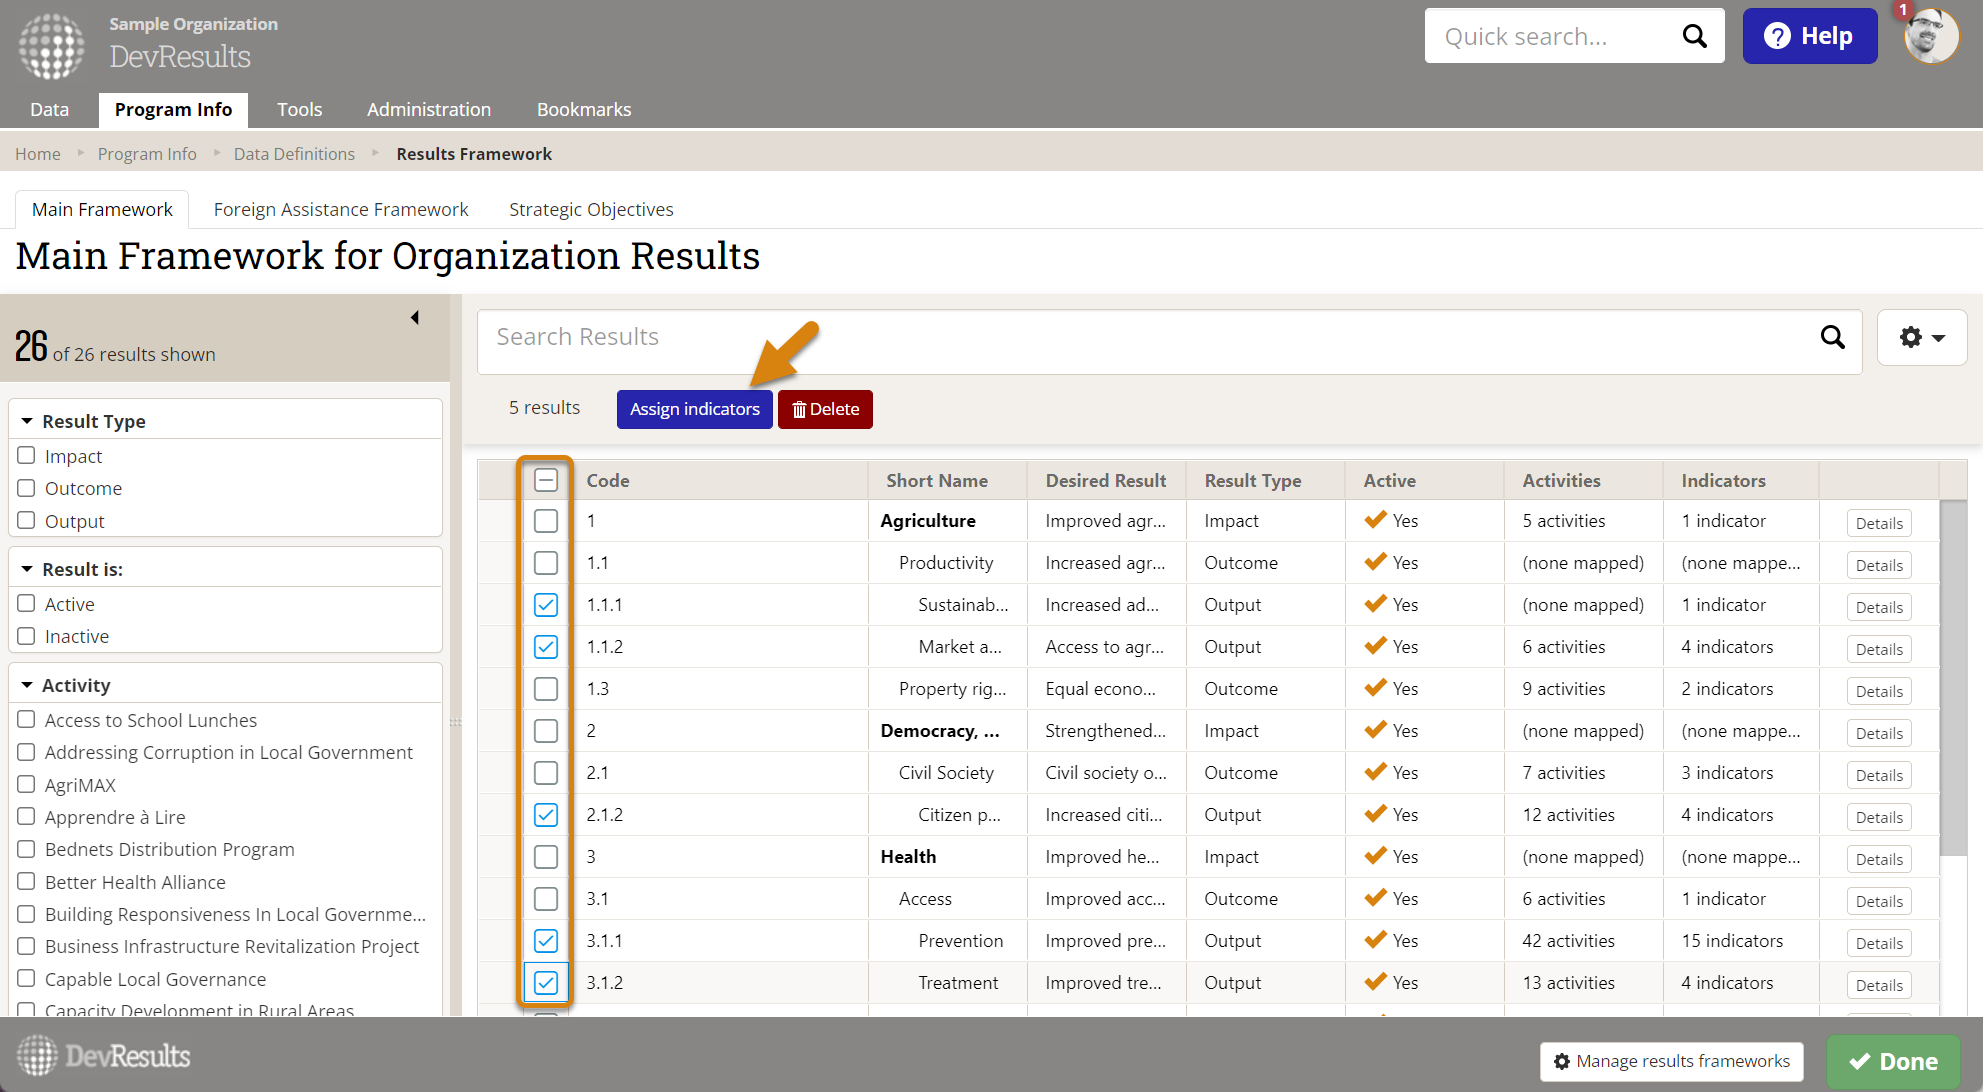
Finally, if you would like to add multiple indicators to multiple results at once, you can use the bulk select to choose multiple results, then click Assign indicators to select a set of indicators.
Delete a results framework
To delete a results framework, go to Program Info > Results Framework.
Existing results frameworks will be displayed in tabs along the top. To delete a results framework, click the Manage results frameworks button in the lower right.
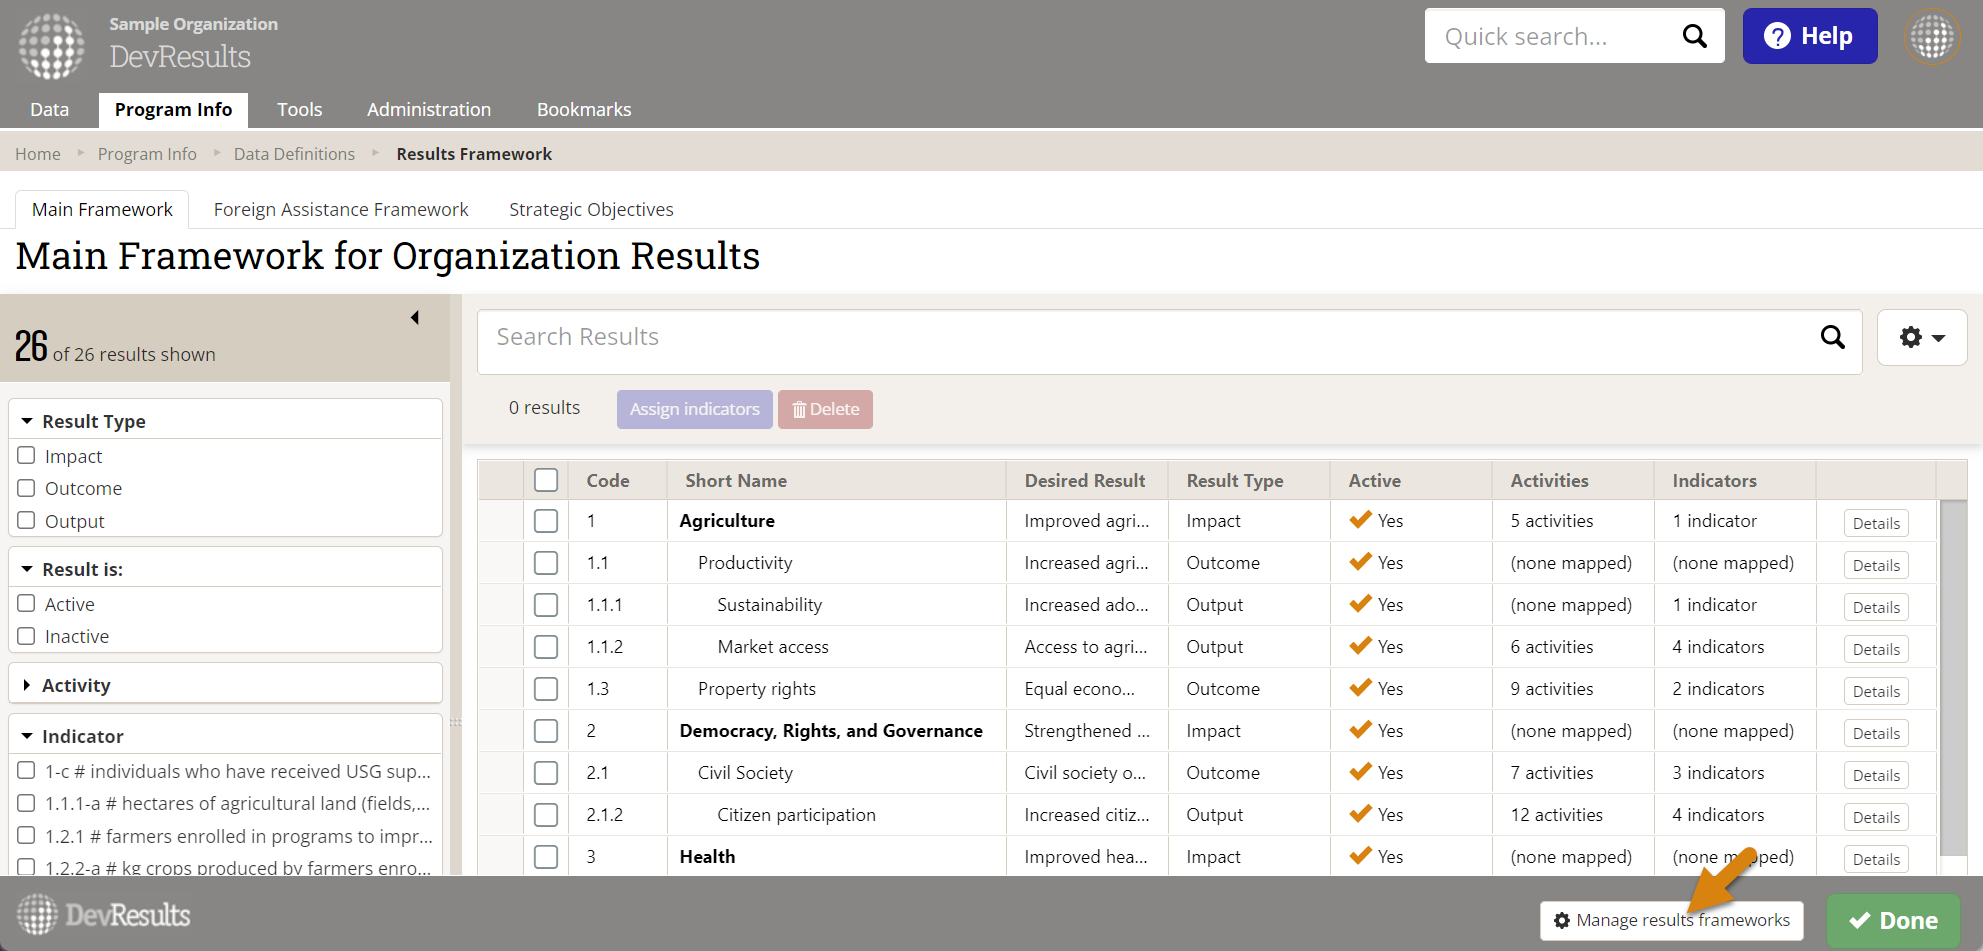
This will open a pop-up displaying the existing frameworks. Click on the X to the left of the results framework you want to delete.

Type DELETE to confirm that you want to delete the results framework and click Confirm.

Understanding the details page for a result
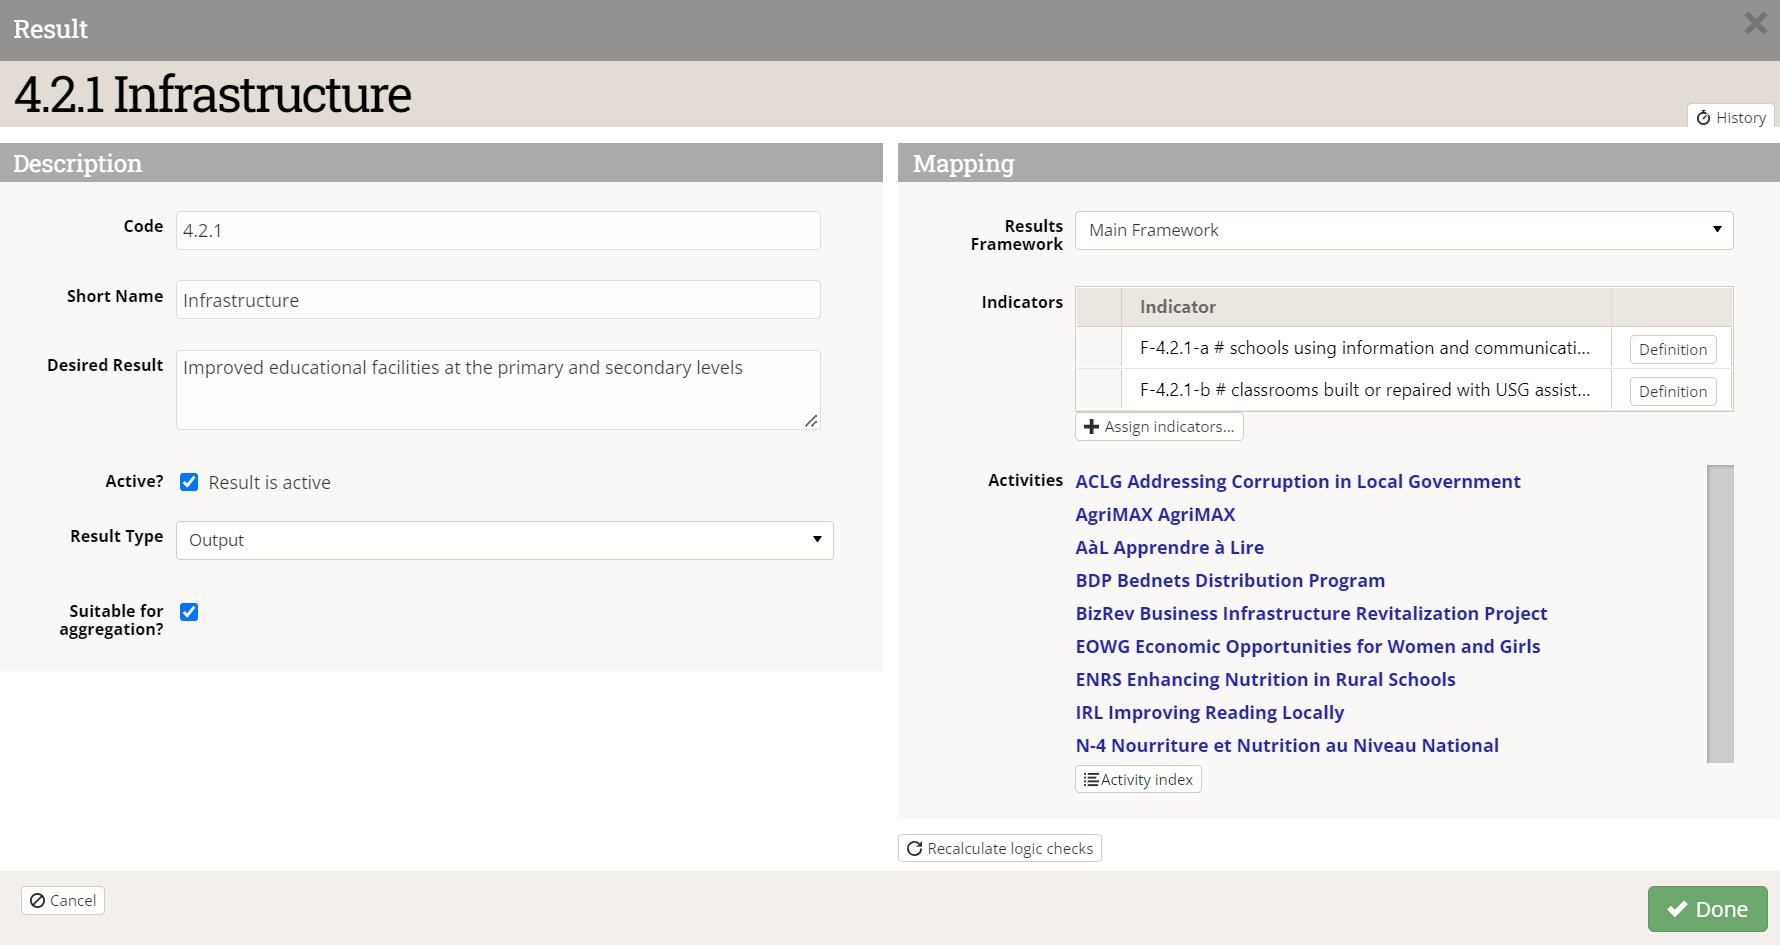
The details button for each result opens a pop-up window with detailed information about the result.
- Code: Each result should have a unique code.
- Short Name: The short name for a result appears alongside the result's code to identify the result with a short phrase.
- Desired Result: The desired result is a description field where you can put the full text of your result (as it might appear in a logframe, PMP, etc.).
- Active?: By default, all results are marked as Active when you create them. You can deactivate results by unchecking this box, which makes them unavailable as options when assigning an indicator to frameworks.
- Result Type: This field is primarily used by IATI publishers, but it can be used even without enabling the IATI feature. It classifies results using the IATI Result Type options (i.e. output, outcome, impact, other).
- Suitable for Aggregation?: This field is only available for DevResults sites with the IATI feature enabled. It defines published data as suitable for aggregation or not.
- Results Framework: This dropdown menu shows which framework the result is part of.
- Indicators: The indicators section shows all the indicators assigned to this result, with buttons that link to their definition pages.
- Projects: The projects section shows all the projects assigned to any of the indicators assigned to this result.
- Recalculate logic checks: Click the Recalculate logic checks button to recalculate any logic checks associated with the assigned indicators.
Visualizing a results framework
While editing and interacting with a results framework is much easier to do in a table, many people are more comfortable viewing the end product in a hierarchy diagram or chart. There are many third-party tools that will allow you to create such visuals using the standard Excel export (see how to export a framework above). Perhaps the easiest tool to work with is the Microsoft Office Visio plug in for Excel, which is available to most Microsoft 365 subscribers already.
To make it as easy as possible, we've created a custom query that formats your results framework information exactly as Visio ingests it. To request that we make this custom query available to your site, simply send a ticket to help@devresults.com, or through the Contact Helpdesk form found in the blue Help menu on any page of your DevResults site.
In order to create a Visio-based hierarchy diagram of any results framework:
- Download the custom query discussed above.
- Filter to a single results framework (column A).
- Copy all other content (columns B-G) without headers.
- In a new Excel sheet or workbook, select Visio Data Visualizer from the Insert menu ribbon.
- Select a Hierarchy flowchart (in the Basic Flowchart group) and click Create; if you would like to use a different chart or diagram type, just let us know in a help ticket.
- Delete the sample data in the table and paste in the content that you copied in step 3.
- Click ↻Refresh to update the diagram graphic.
You can continue to update the colors and formatting of the graphic to suit your needs and brand guidelines. For instance, you might want to flip the direction of your connector arrows, as the default process-based flowchart flows 'down' whereas logic-based results frameworks tend to flow 'up'.
Didn't answer your question? Please email us at help@devresults.com.