Many IT departments have configured some kind of Single Sign-On (SSO) for users to have a single set of credentials to access common applications. If you're looking to integrate DevResults more fully with your existing IT environment, you now have the option to integrate your SSO provider with DevResults to handle user credential authentication. We support SSO integration with Azure Active Directory, with Active Directory via OAuth2, and with Okta. This page will walk you through how DevResults-SSO integration works and provide instructions on how to set it up.
Jump to:
User Administration
DevResults offers two options for user account creation when using SSO:
- Option 1: A new user account must be created in DevResults before that user can log into DevResults using the SSO provider.
- Option 2: User accounts in DevResults are created when a new user logs into DevResults using the SSO provider.
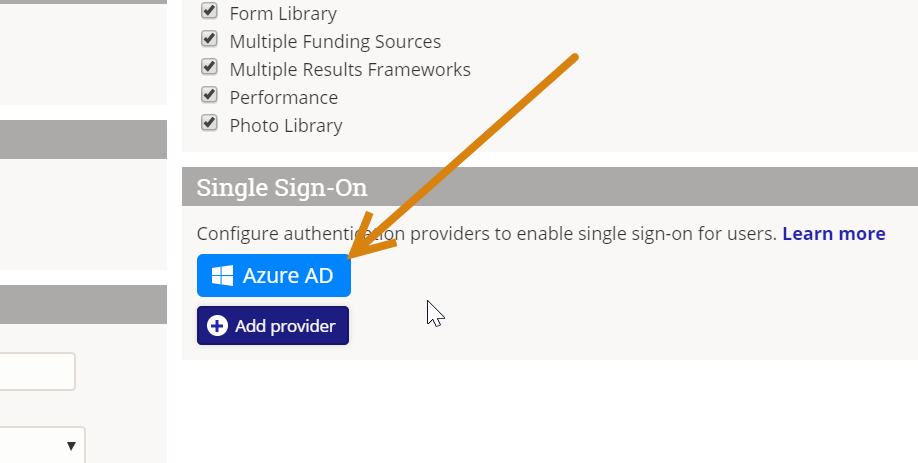
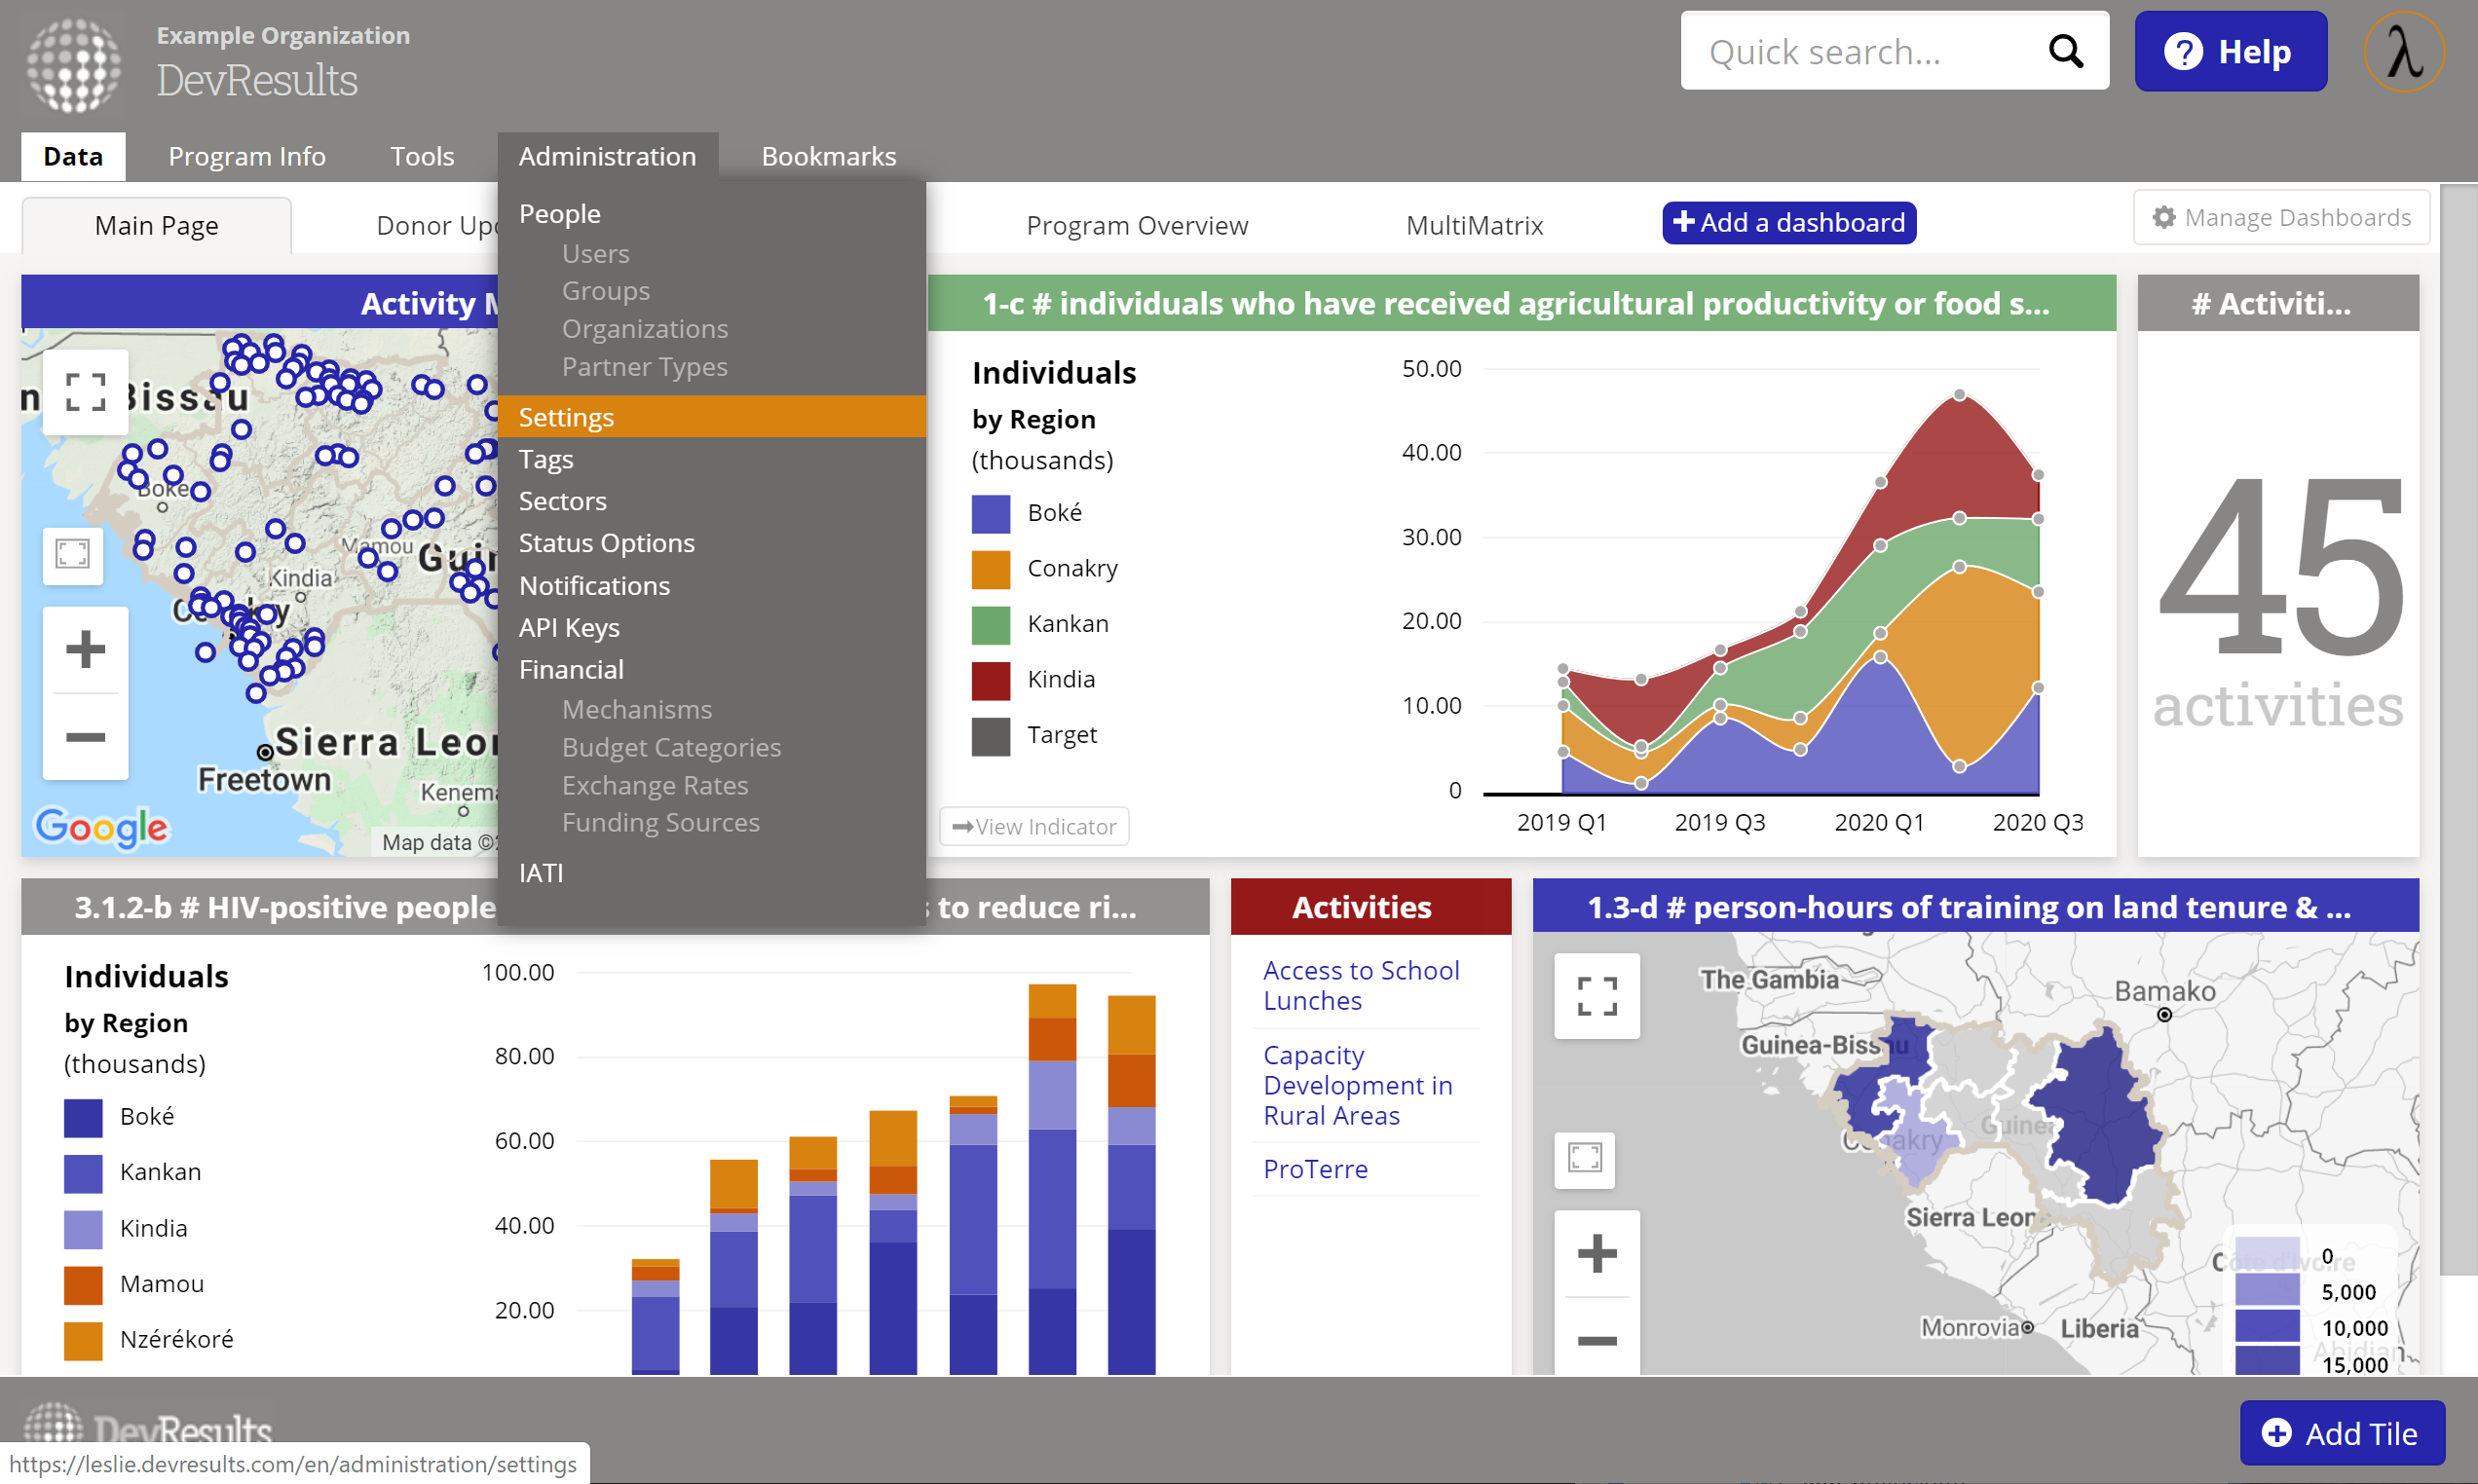
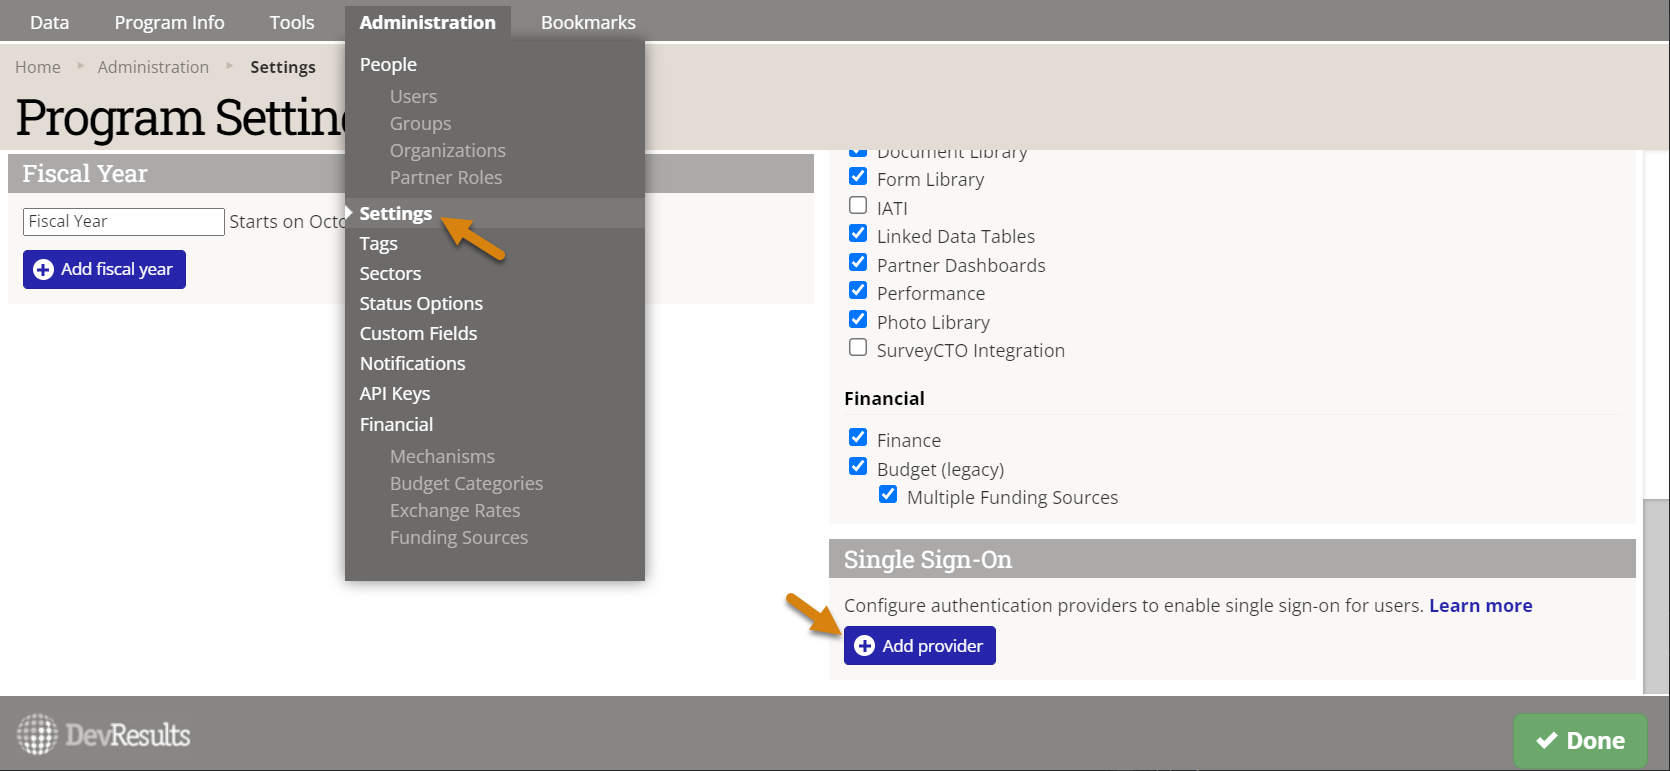
To choose an option for your DevResults site, go to the Administration > Settings and click on your authentication provider.

In the pop-up, make sure the Allow new users? option is unchecked for option 1. For option 2, make sure it is checked.

For option 1, if someone tries to log in via SSO when they don't have an account, they'll see a message noting that they must be added to the DevResults site by an administrator before they can log in.

Note that the two accounts — SSO and DevResults — are linked but are independent. The Login Mode configuration determines whether or not password-based logins will still be allowed for some or any users once a SSO integration has been setup (see the following sections for instructions).
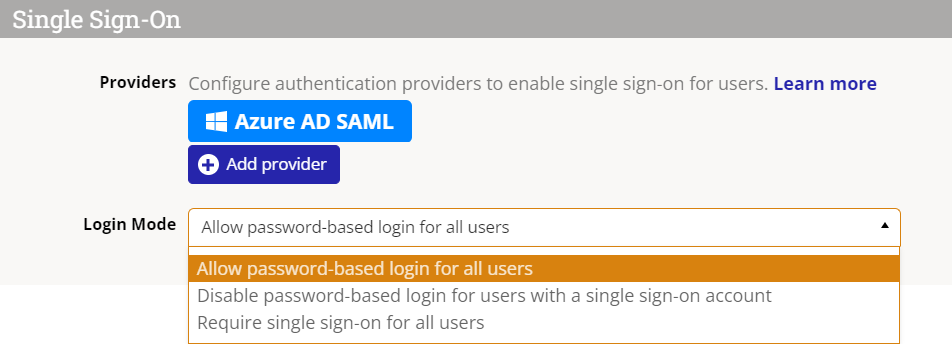
- Allow password-based login for all users: any user can establish and use a password to log into DevResults.
- Disable password-based login for users with a single sign-on account: any user with an active SSO account will be prevented from using a password-based login, but all other users (e.g. external partners, local staff, etc.) will still be able to log on using passwords.
- Require single sign-on for all users: password-based logins are fully disabled for all users; the SSO platform manages all access to DevResults for all users.
Please note that deleting or deactivating a user from Active Directory does not automatically delete or deactivate their account in DevResults. If they've only ever logged in using SSO, it will prevent them from logging in. However, if they ever established a DevResults password outside of SSO, they would still be able to access the site using that password. Therefore, we recommend still having a designated DevResults site administrator oversee permissions and account deactivation within DevResults.
SSO Integration Setup
We support SSO integration with Azure Active Directory and with Active Directory via OAuth2. For both setups, the overall process is:
- Do some configuration and setup on your SSO provider side to gather the information you need.
- Enter some of that information in DevResults so it recognizes your SSO provider.
Azure EntraID
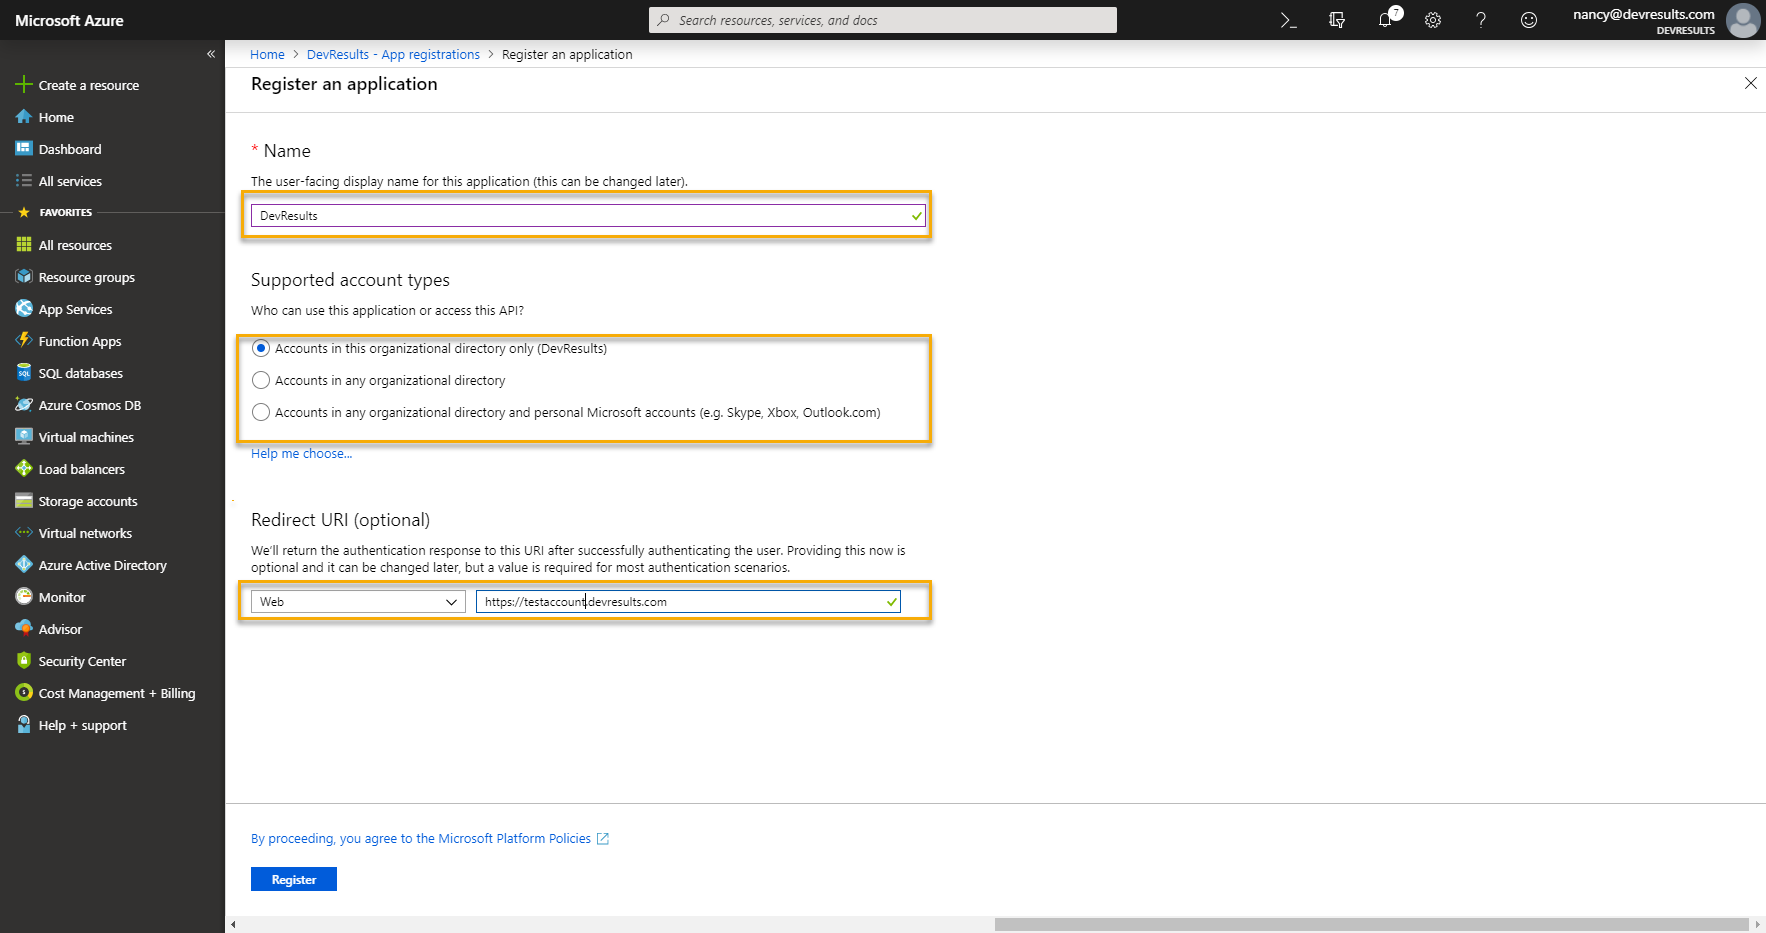
For Azure EntraID, you will need to have a registered application within Azure EntraID, and you'll need to know the Application ID and have a Key generated. We'll provide a quick outline of those steps here as a sample and then walk you through the DevResults side of the setup.
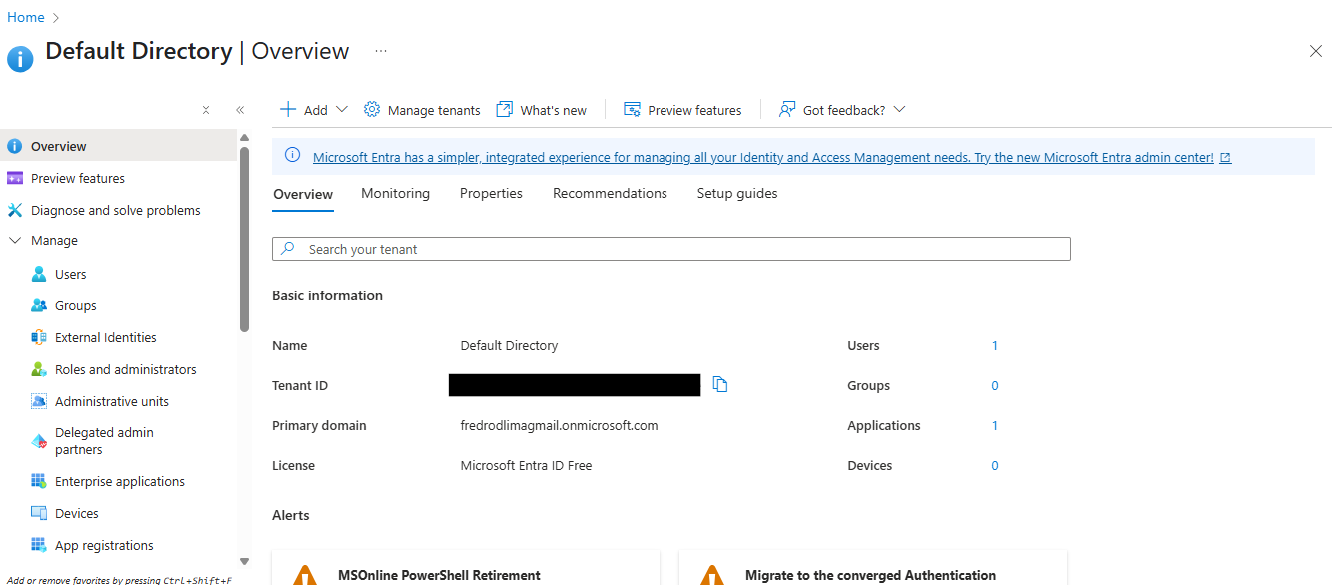
Make sure to copy the Tenant ID value, as that will be used later on.
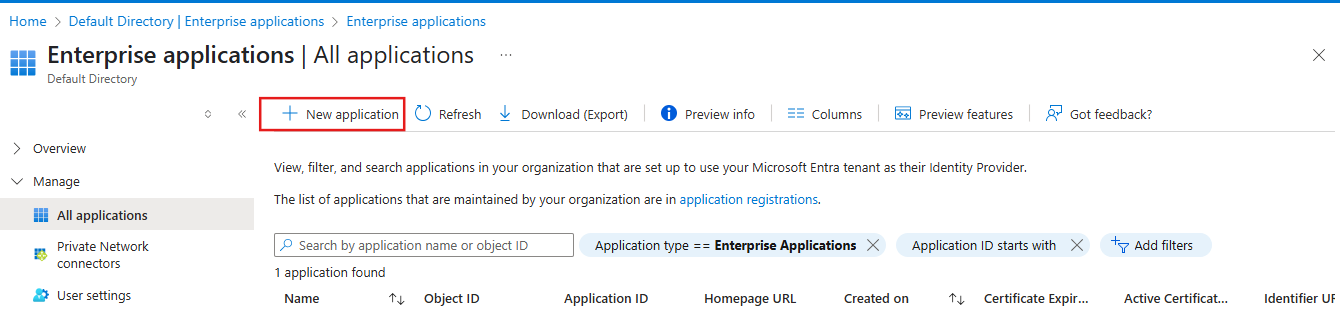
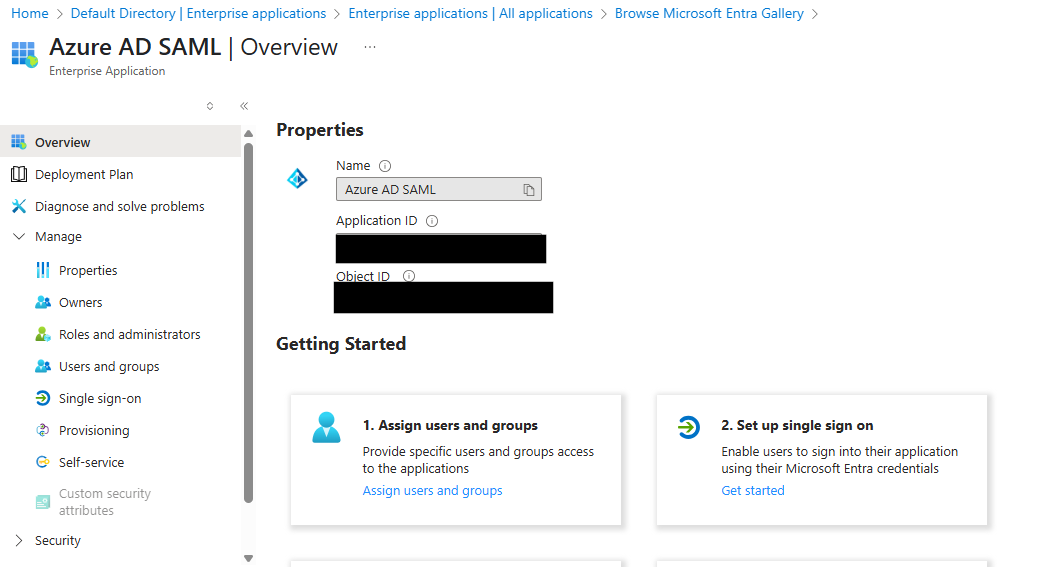
2. In the Manage section, click on the Enterprise applications
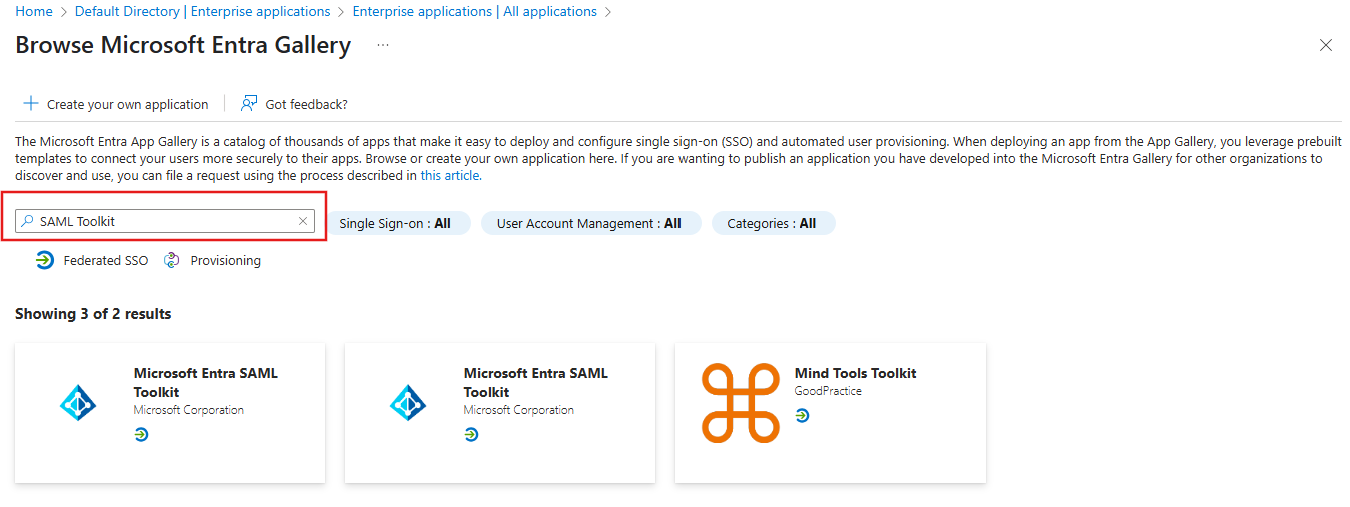
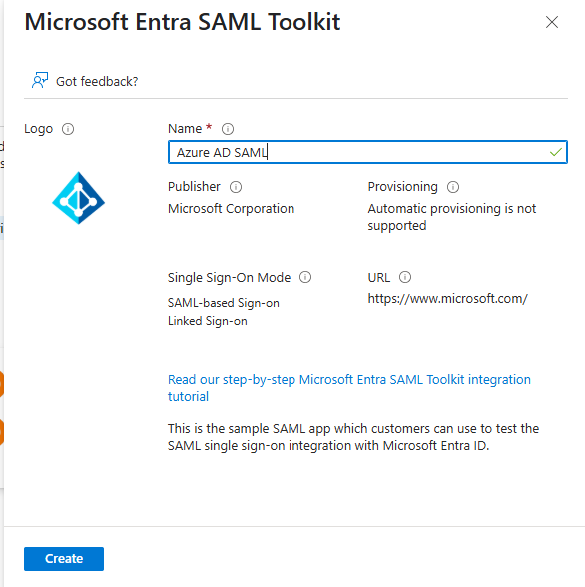
4. Type SAML Toolkit in the search bar
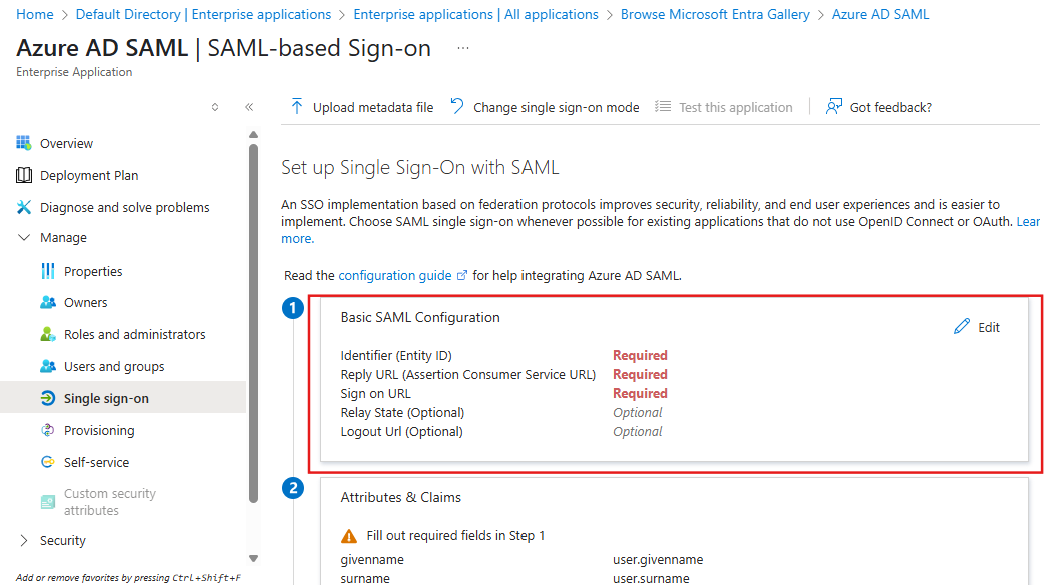
Identifier (Entity ID): https://YOURSITE.devresults.com/saml-sp
Reply URL: https://YOURSITE.devresults.com
Sign on URL: https://YOURSITE.devresults.com
The content should be something like
-----BEGIN CERTIFICATE-----
Certificate value
-----END CERTIFICATE-----
11. Copy this text so you can configure the DevResults side of things. Navigate to your DevResults site and configure a new authentication provider that uses Azure Active Directory. In the Application ID field, paste the TenantID from Step 1, and in the Secret field, paste the certificate string containing all the string text from Step 10.
That's it! You've done everything you need to do in Azure. Back in DevResults, you'll see the provider appear on the DevResults Administration > Settings page. You can click to edit or delete it.
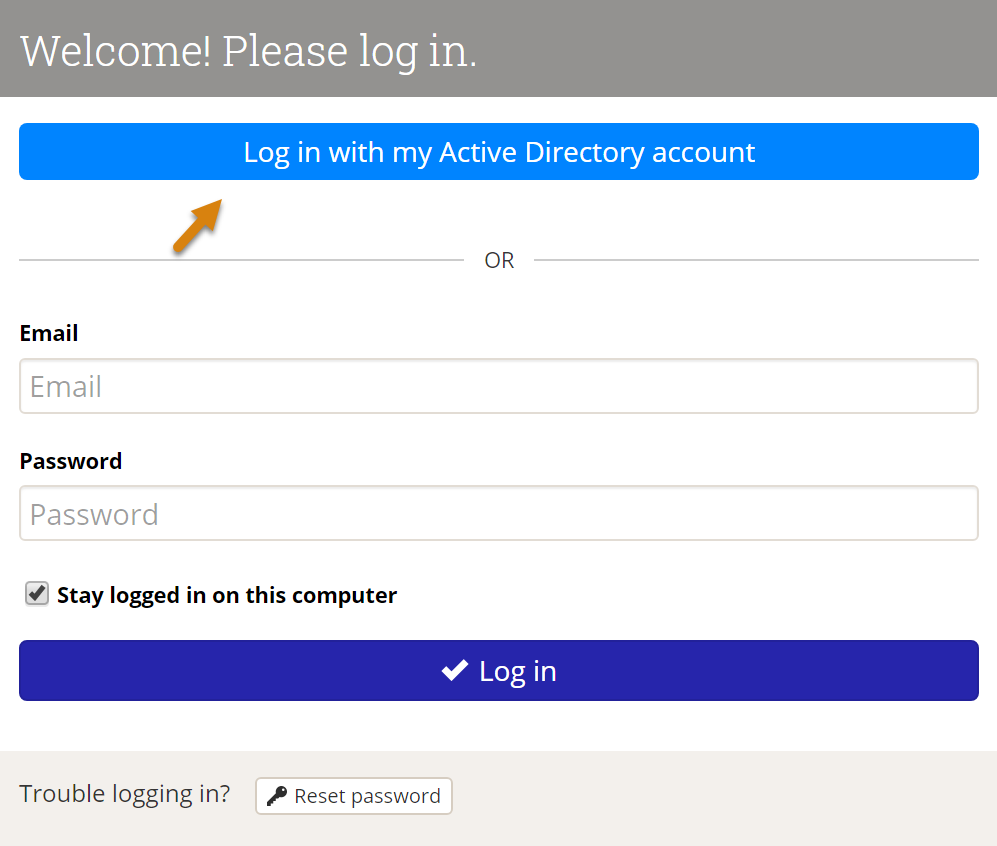
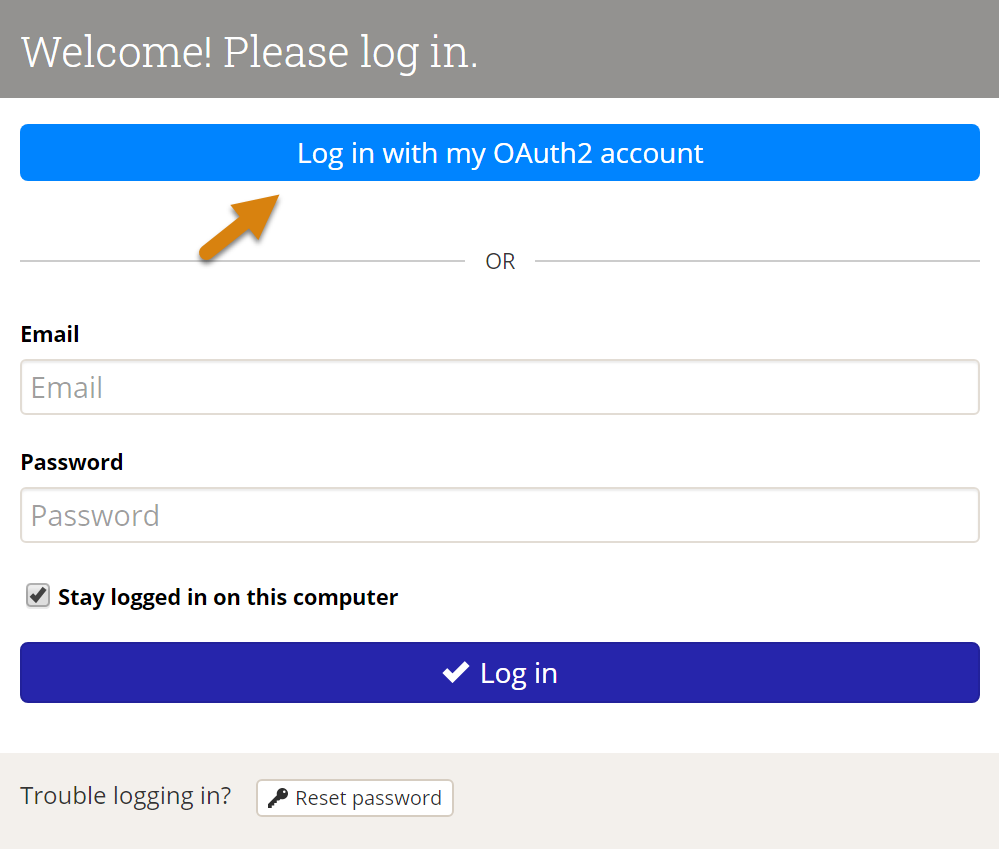
With the SSO set up and enabled, your DevResults Login page will look slightly different. It will now show a "Log in with my ___ account" option as well as the regular login. Users can either use their DevResults username and password (if they already have one) or their SSO.
The first time they log in using the Azure AD account, they'll be redirected to a Microsoft login screen where they'll need to enter their credentials for Active Directory.

Once they've entered credentials, they will need to grant DevResults permission to "sign you in and read your profile". This is only necessary the first time the user logs in using this method.

Once that's done, all future sign-ins using the Use my Azure AD account should just work. The page should now redirect to the DevResults site.
Active Directory via OAuth2
Configuring an Active Directory authentication via OAuth2 is fairly similar to the Azure Active Directory setup, except the configuration on the AD side must be done via Powershell script. Here's a good general set of instructions on how to do so. You'll need to specify the endpoint, a resource name, and the full Redirect URI.
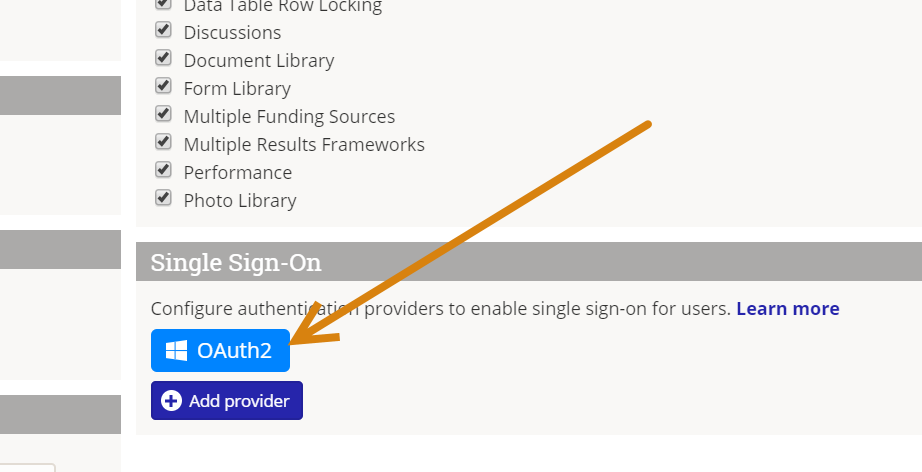
Once these are set up, you can set up the DevResults portion. In your DevResults site, go to Administration > Settings.
In the Single Sign-On section, click the Add provider button.
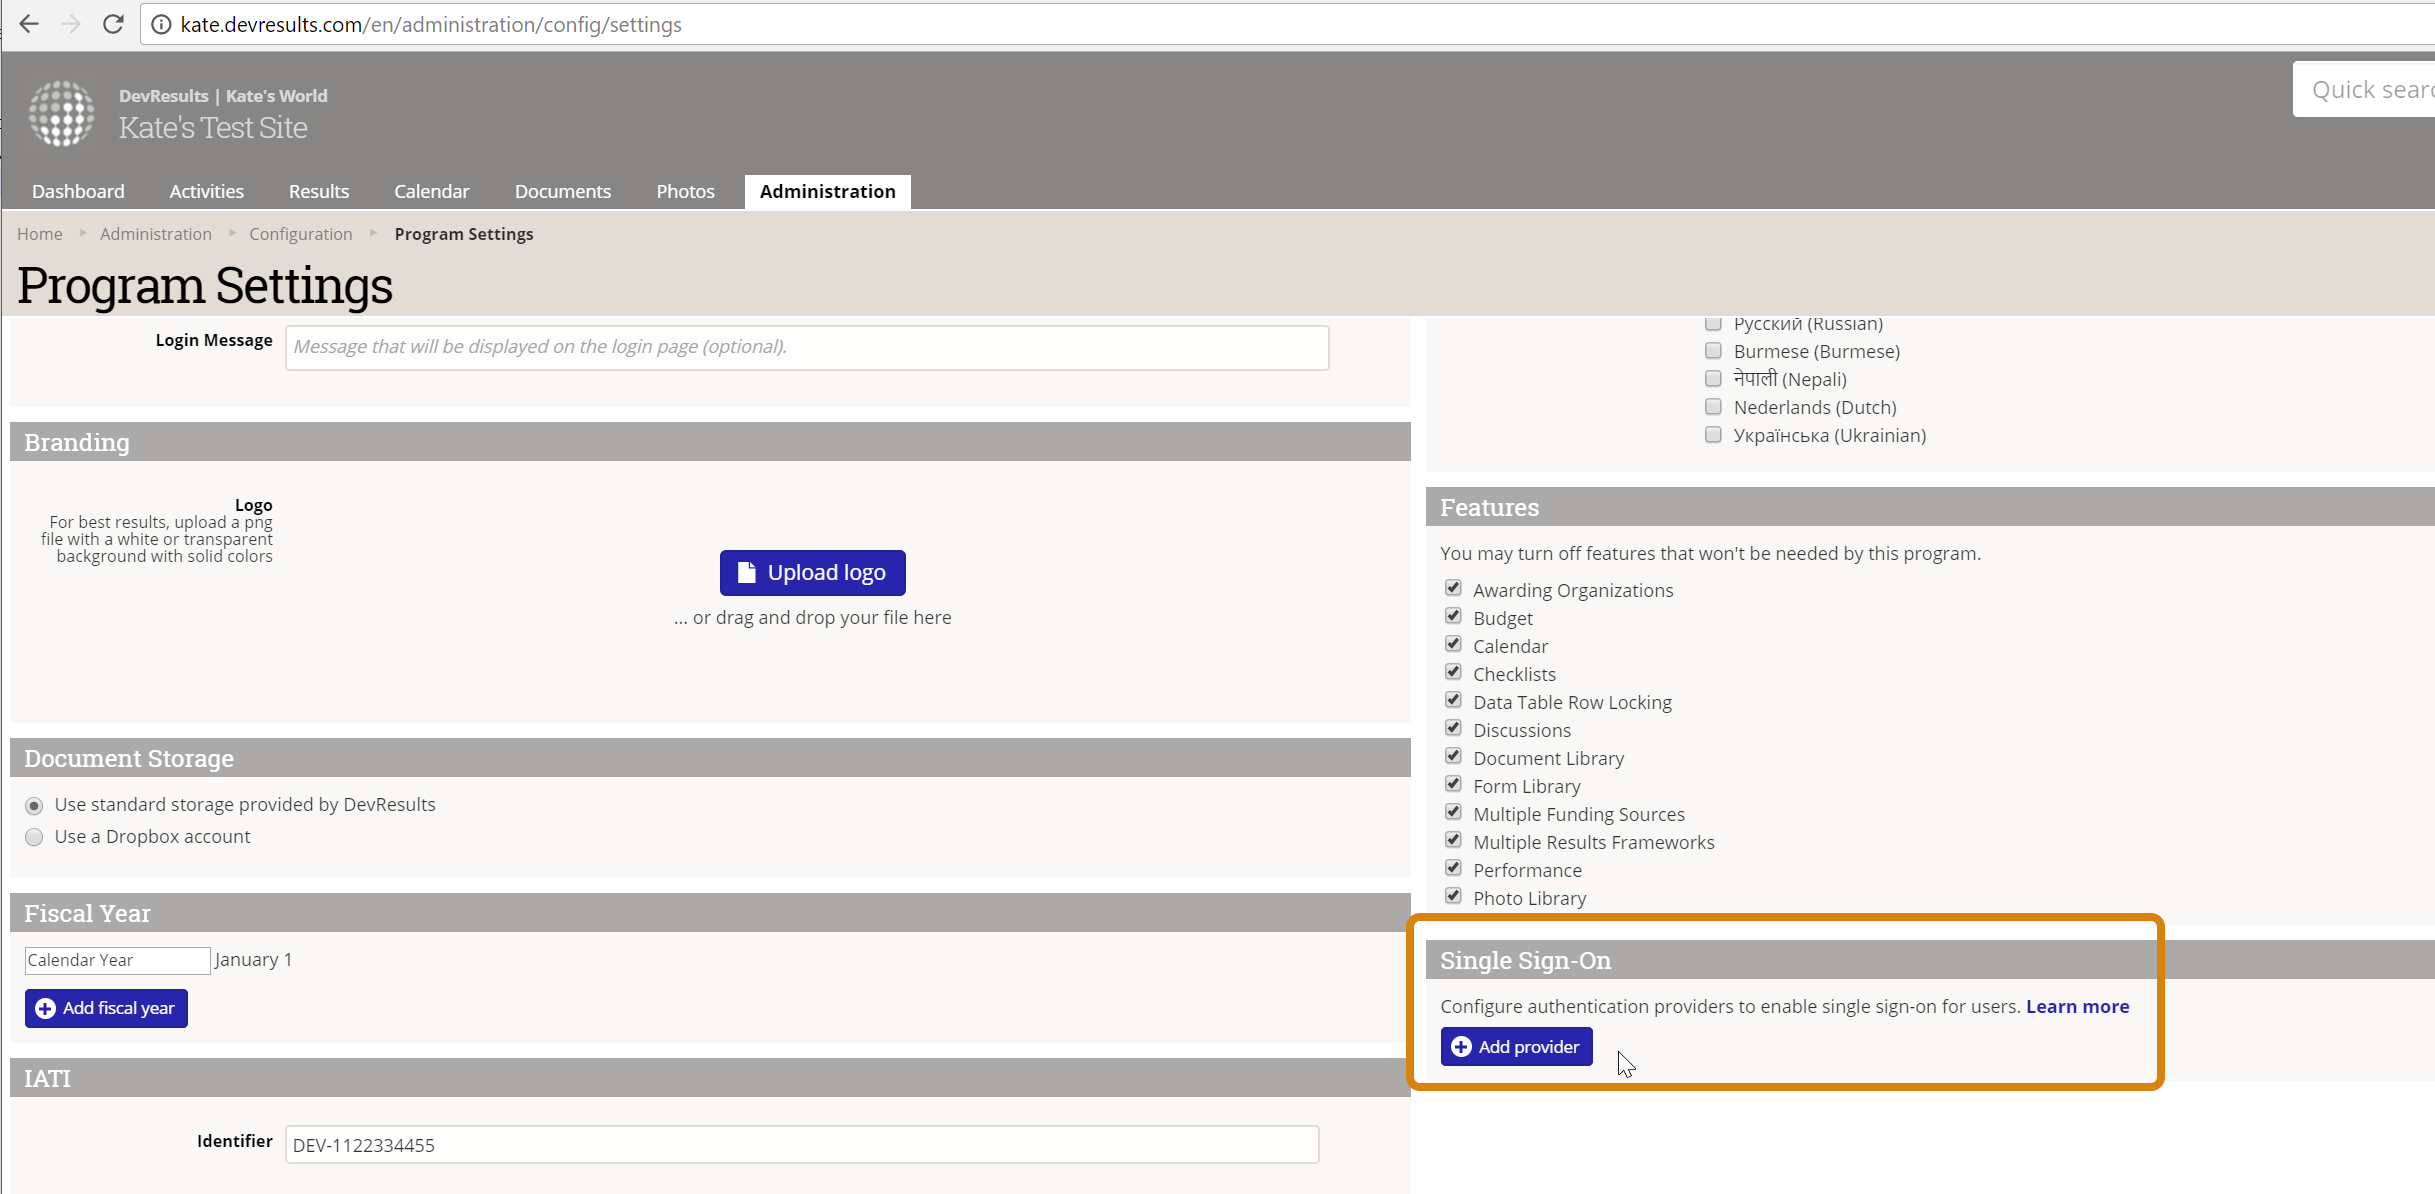
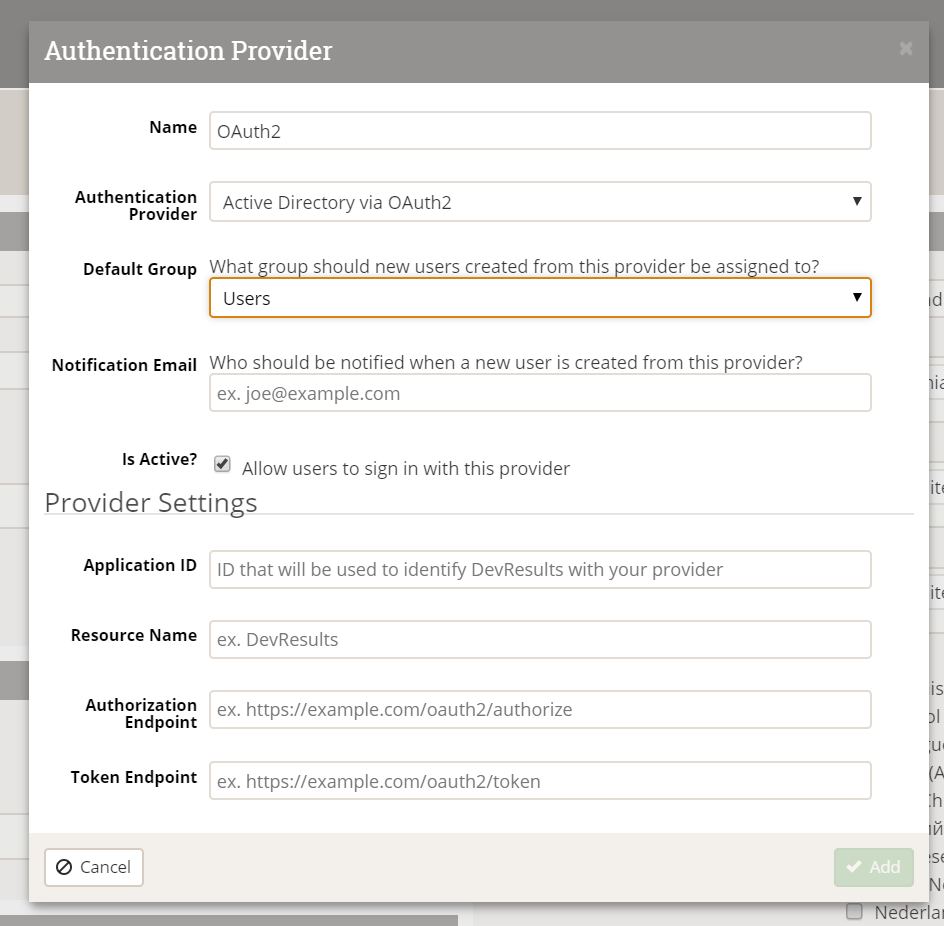
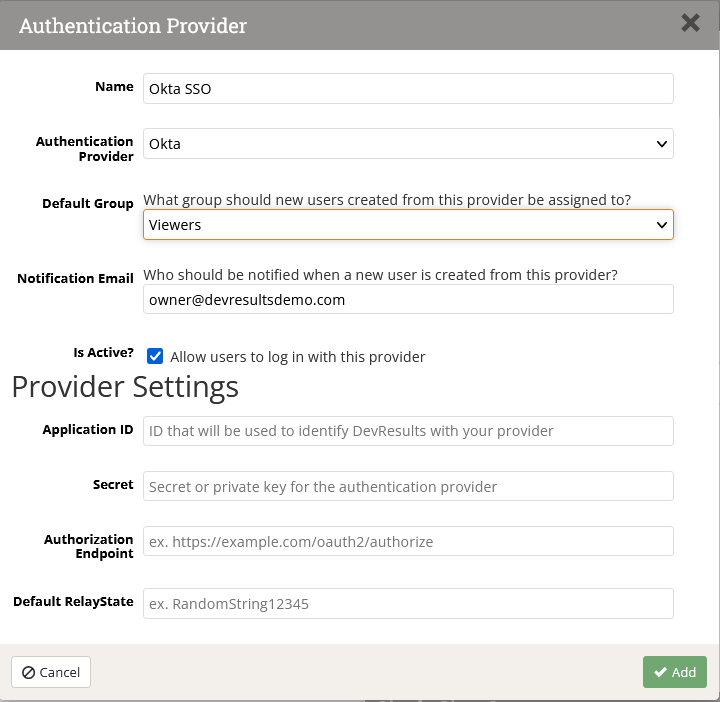
This will open the Authentication Provider pop-up. You'll need to complete these sections to configure the integration:
- Name: Provide a name for this SSO. We used OAuth2 in our example. This label will appear to end-users on their login screen ("Use my {Name} account") so be sure it's something your users will understand!
- Authentication Provider: Currently DevResults supports Azure Active Directory and Active Directory via OAuth2. For this example, select Active Directory via OAuth2.
- Default Group: When new users are created in DevResults from Active Directory, what group should they be added to by default? For our example, we used our standard Users group, but you can choose any existing group in your DevResults site.
- Notification Email: If you want anyone to be notified when a new DevResults user is created from Active Directory, enter their email address here. (Optional)
- Is Active?: You can uncheck this box if you don't want this provider to be currently used; otherwise, check the box to make sure it's going to be used.
- Provider Settings: Application ID: Paste in the Application ID you configured in your PowerShell script
- Provider Settings: Resource Name: Use the Resource Name you configured in your PowerShell script
- Provider Settings: Authorization Endpoint: Use the Endpoint you configured in your PowerShell script
- Token Endpoint: Use the token endpoint you configured in your PowerShell script
Once these fields are filled out, click the Add button to save your configuration settings.
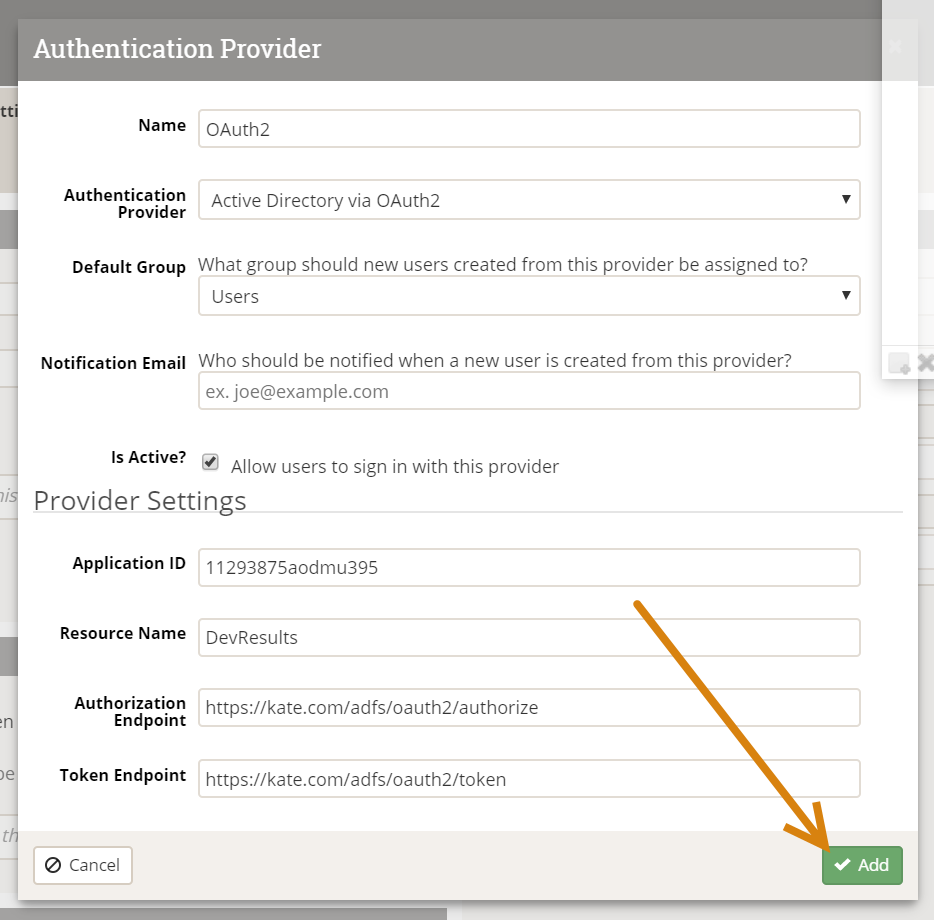
Once it's added, you'll see the provider appear on the DevResults Administration / Settings page. You can click to edit or delete it.
With the SSO set up and enabled, your DevResults Login page will look slightly different. It will now show a "Log in with my ___ account" option as well as the regular login. Users can either use their DevResults username and password (if they already have one) or their SSO.
The first time they log in using the OAuth2 account, they'll be redirected to page based on your OAuth2 settings to enter credentials and grant DevResults access.
Okta Setup
DevResults can be integrated with your existing Okta environment in just a few easy steps. The first part of this process is also documented in Okta's developer documentation, replicated here for your convenience.
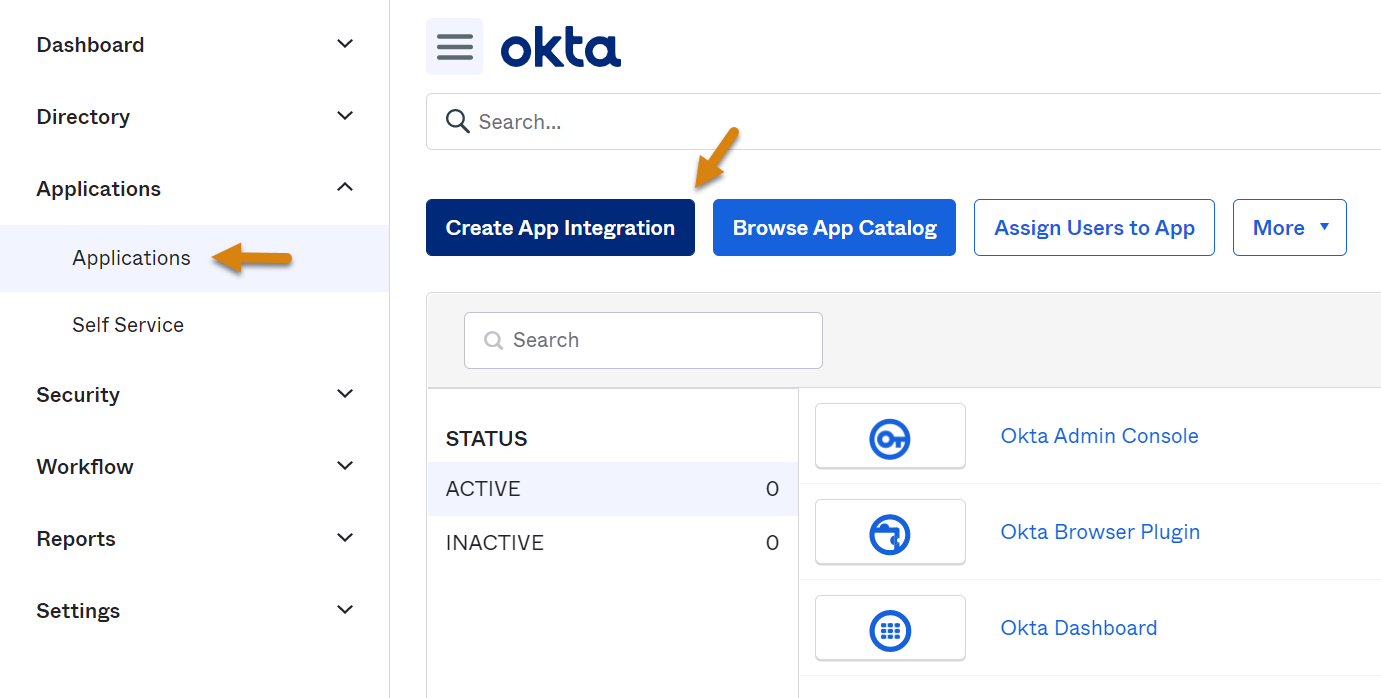
1. Sign into your Okta Admin Console and go to Applications->Applications (from the left hand side menu) and click on Create App Integration.
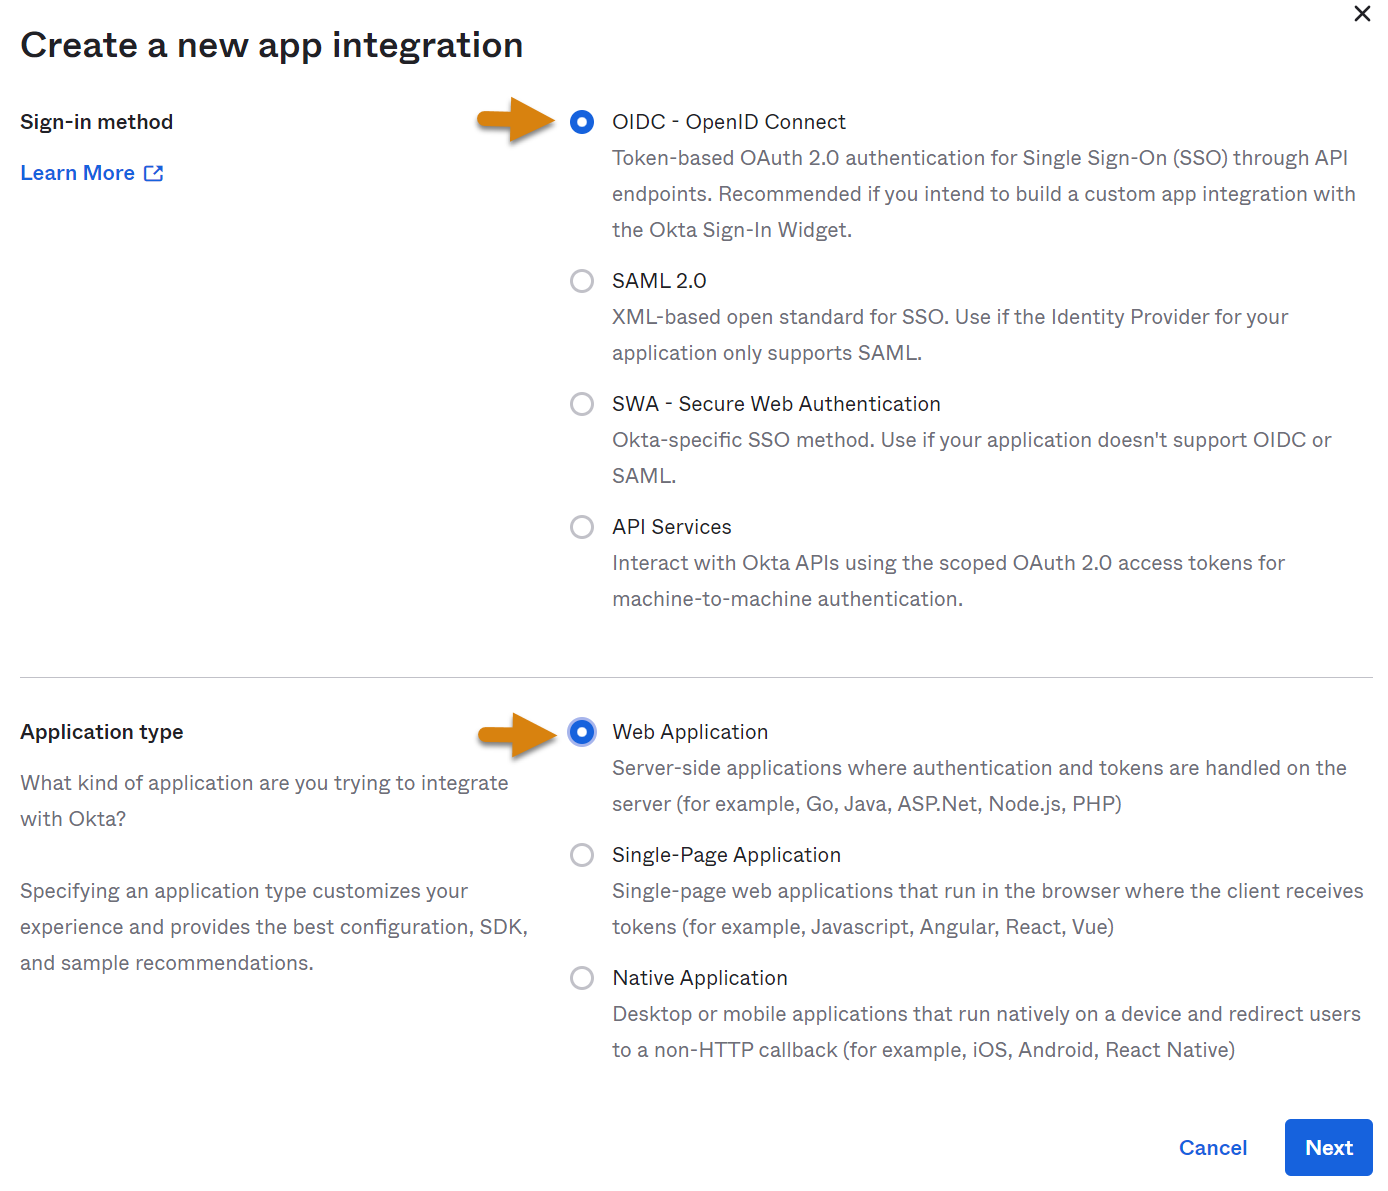
2. Select either ODIC - OpenID Connect or SAML 2.0 as the sign-in method and Web Application as the application type, then click Next.
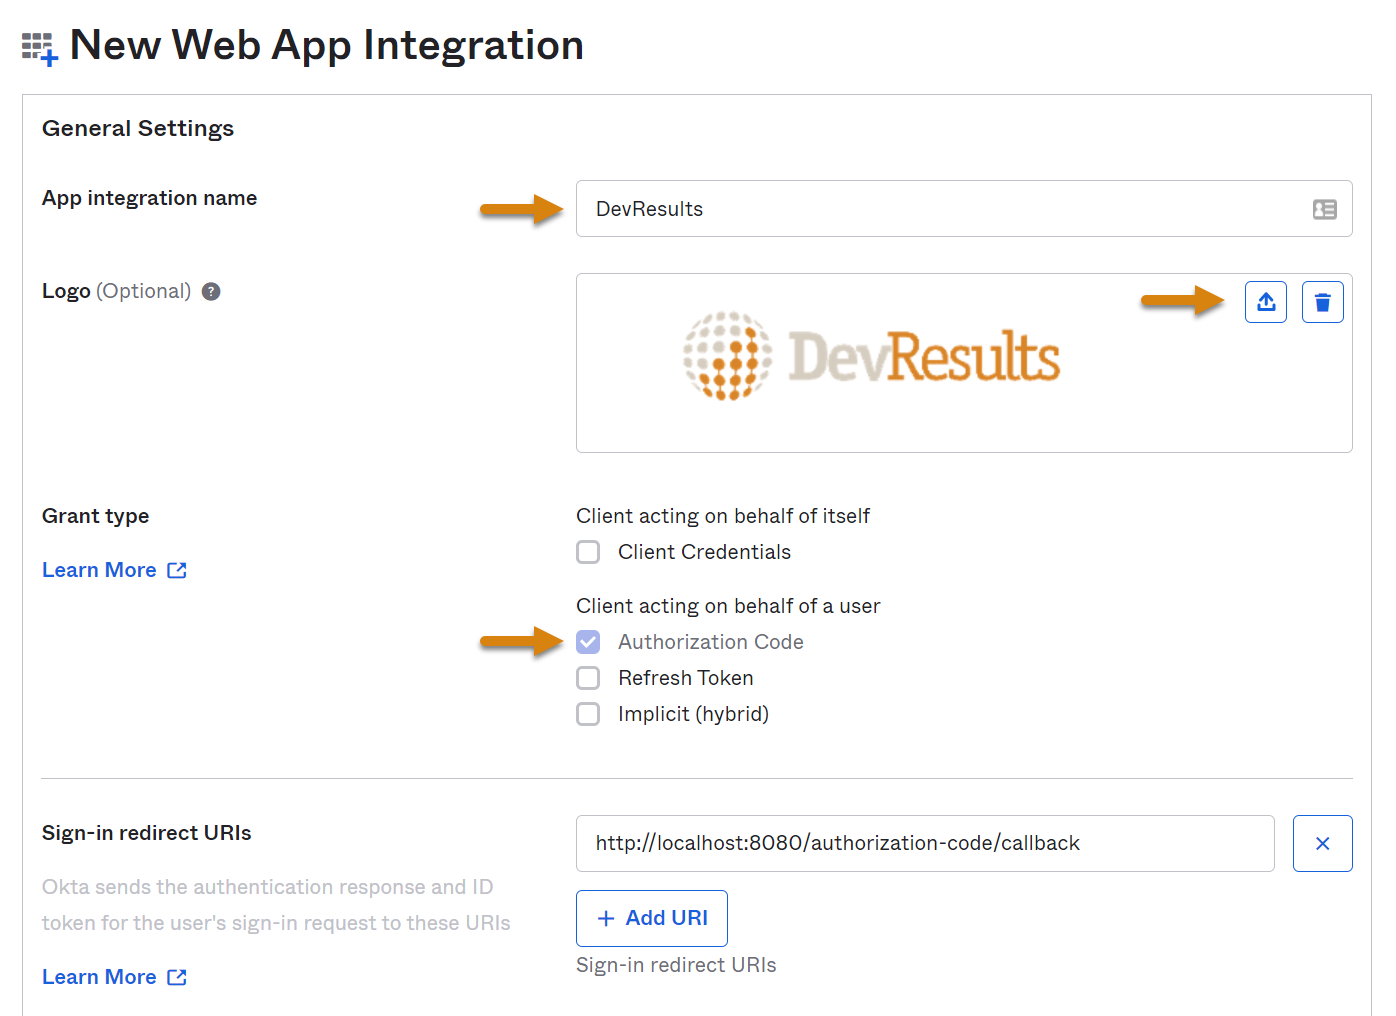
3. If this is an OIDC connectionn, specify the App integration name (e.g. DevResults), upload the DevResults logo (optional), leave the Grant type set to Authorization Code, and click Save. Later, you'll need to revise the Sign-in redirect URI, but you'll have to finish the next step in DevResults before you'll be able to change these fields.
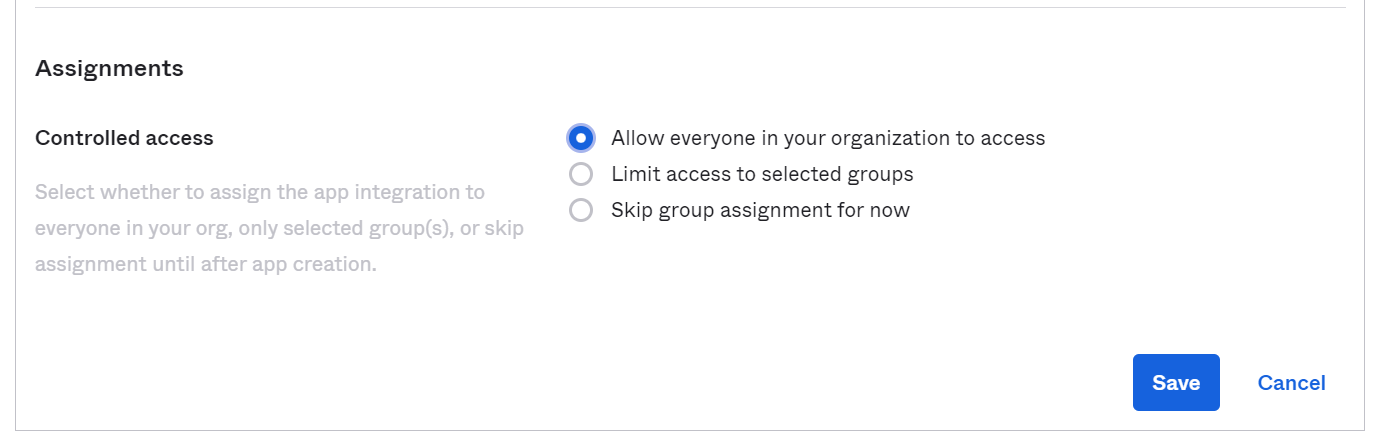
Note: if you have already established access groups, you can limit access to select groups at the bottom of this page. If not, you can allow everyone in your organization to access DevResults via Okta SSO.
If you're connecting using SAML 2.0:
- Okta's Single Sign-On URL -> DevResults Redirect URI
- Okta's Audience URI -> https://{your instance subdomain}.devresults.com/
saml-sp
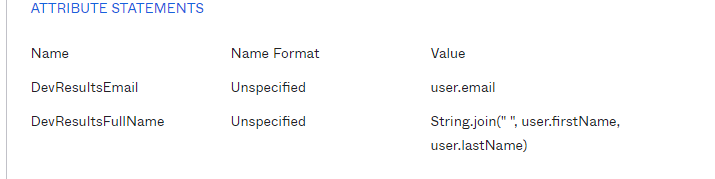
Add an Attribute Statement with Name "DevResultsEmail" and Value "user.email" and a second Attribute Statement with Name "DevResultsFullName" and Value String.join(" ", user.firstName, user.lastName) as below. Be careful, these are case sensitive!
4. In DevResults, go to Administration > Settings. In the Single Sign-On section, click the Add provider button.
5. In the following screen, select Okta as the Authentication Provider and fill out the other fields accordingly. If connecting using ODIC, you'll need to get the following fields from Okta (after saving your configuration in step 3 above) to fill in the Provider Settings section:
- Okta's Client ID -> DevResults Application ID
- Okta's Client secret -> DevResults Secret
- Okta domain -> Authorization Endpoint, in the format https://{Okta domain goes here}/oauth2, e.g. https://okta-server/oauth2.
If using SAML 2.0:
- Okta's Single Sign-On URL -> DevResults Authorization Endpoint
- Okta's Entity ID -> DevResults Application ID
- Okta's X.509 Certificate -> DevResults Secret (NOTE: include ----BEGIN CERTIFICATE----- and -----END CERTIFICATE----)
- Default RelayState to any string value you want, just remember to add it to Okta's Default Relay State
Once every field is populated, click Add.
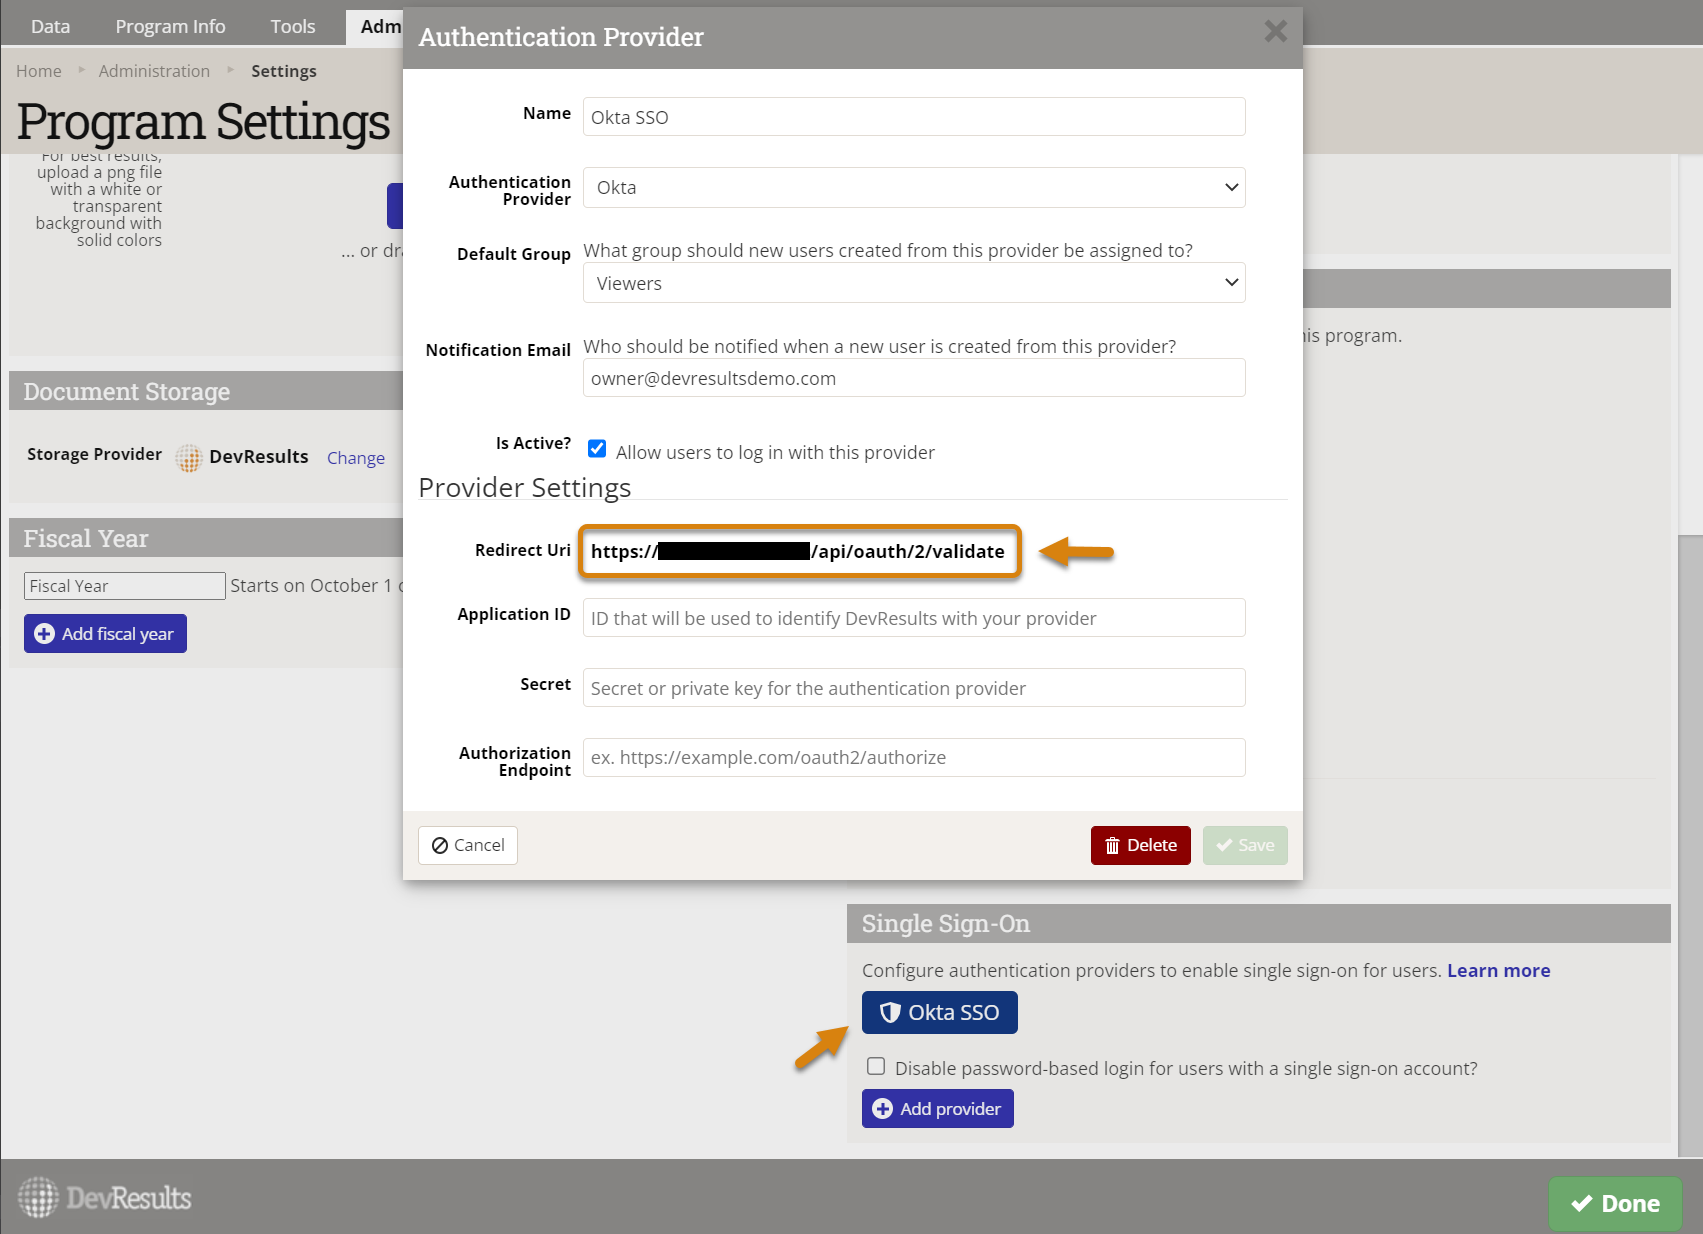
6. You should see a new authentication provider, with the name you provided in the previous step (e.g. Okta SSO). Click this button and copy the Redirect URI that has been created.
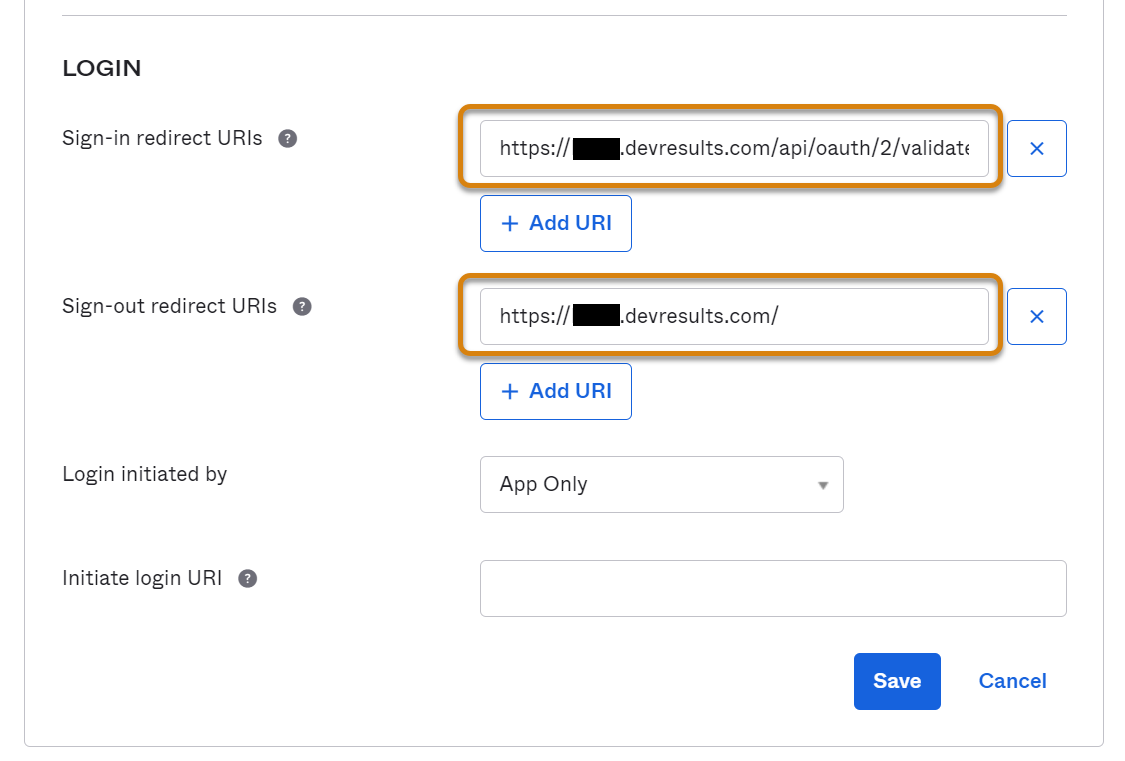
7. Back in Okta, click on Edit in the General Settings box and paste the Redirect URI from DevResults into the Sign-in redirect URI field. In the Sign-out redirect URI field, paste the same text but take off everything after devresults.com (in otherwords, just include the root domain).
Frequently Asked Questions
How can I tell if I'm using a DevResults account or their Active Directory Account?
A user can tell if their DevResults account is related to an Active Directory account in their Profile details. Click on your profile picture in the upper right and select Edit Profile. The Connected Accounts section will have an entry if you're using Active Directory:
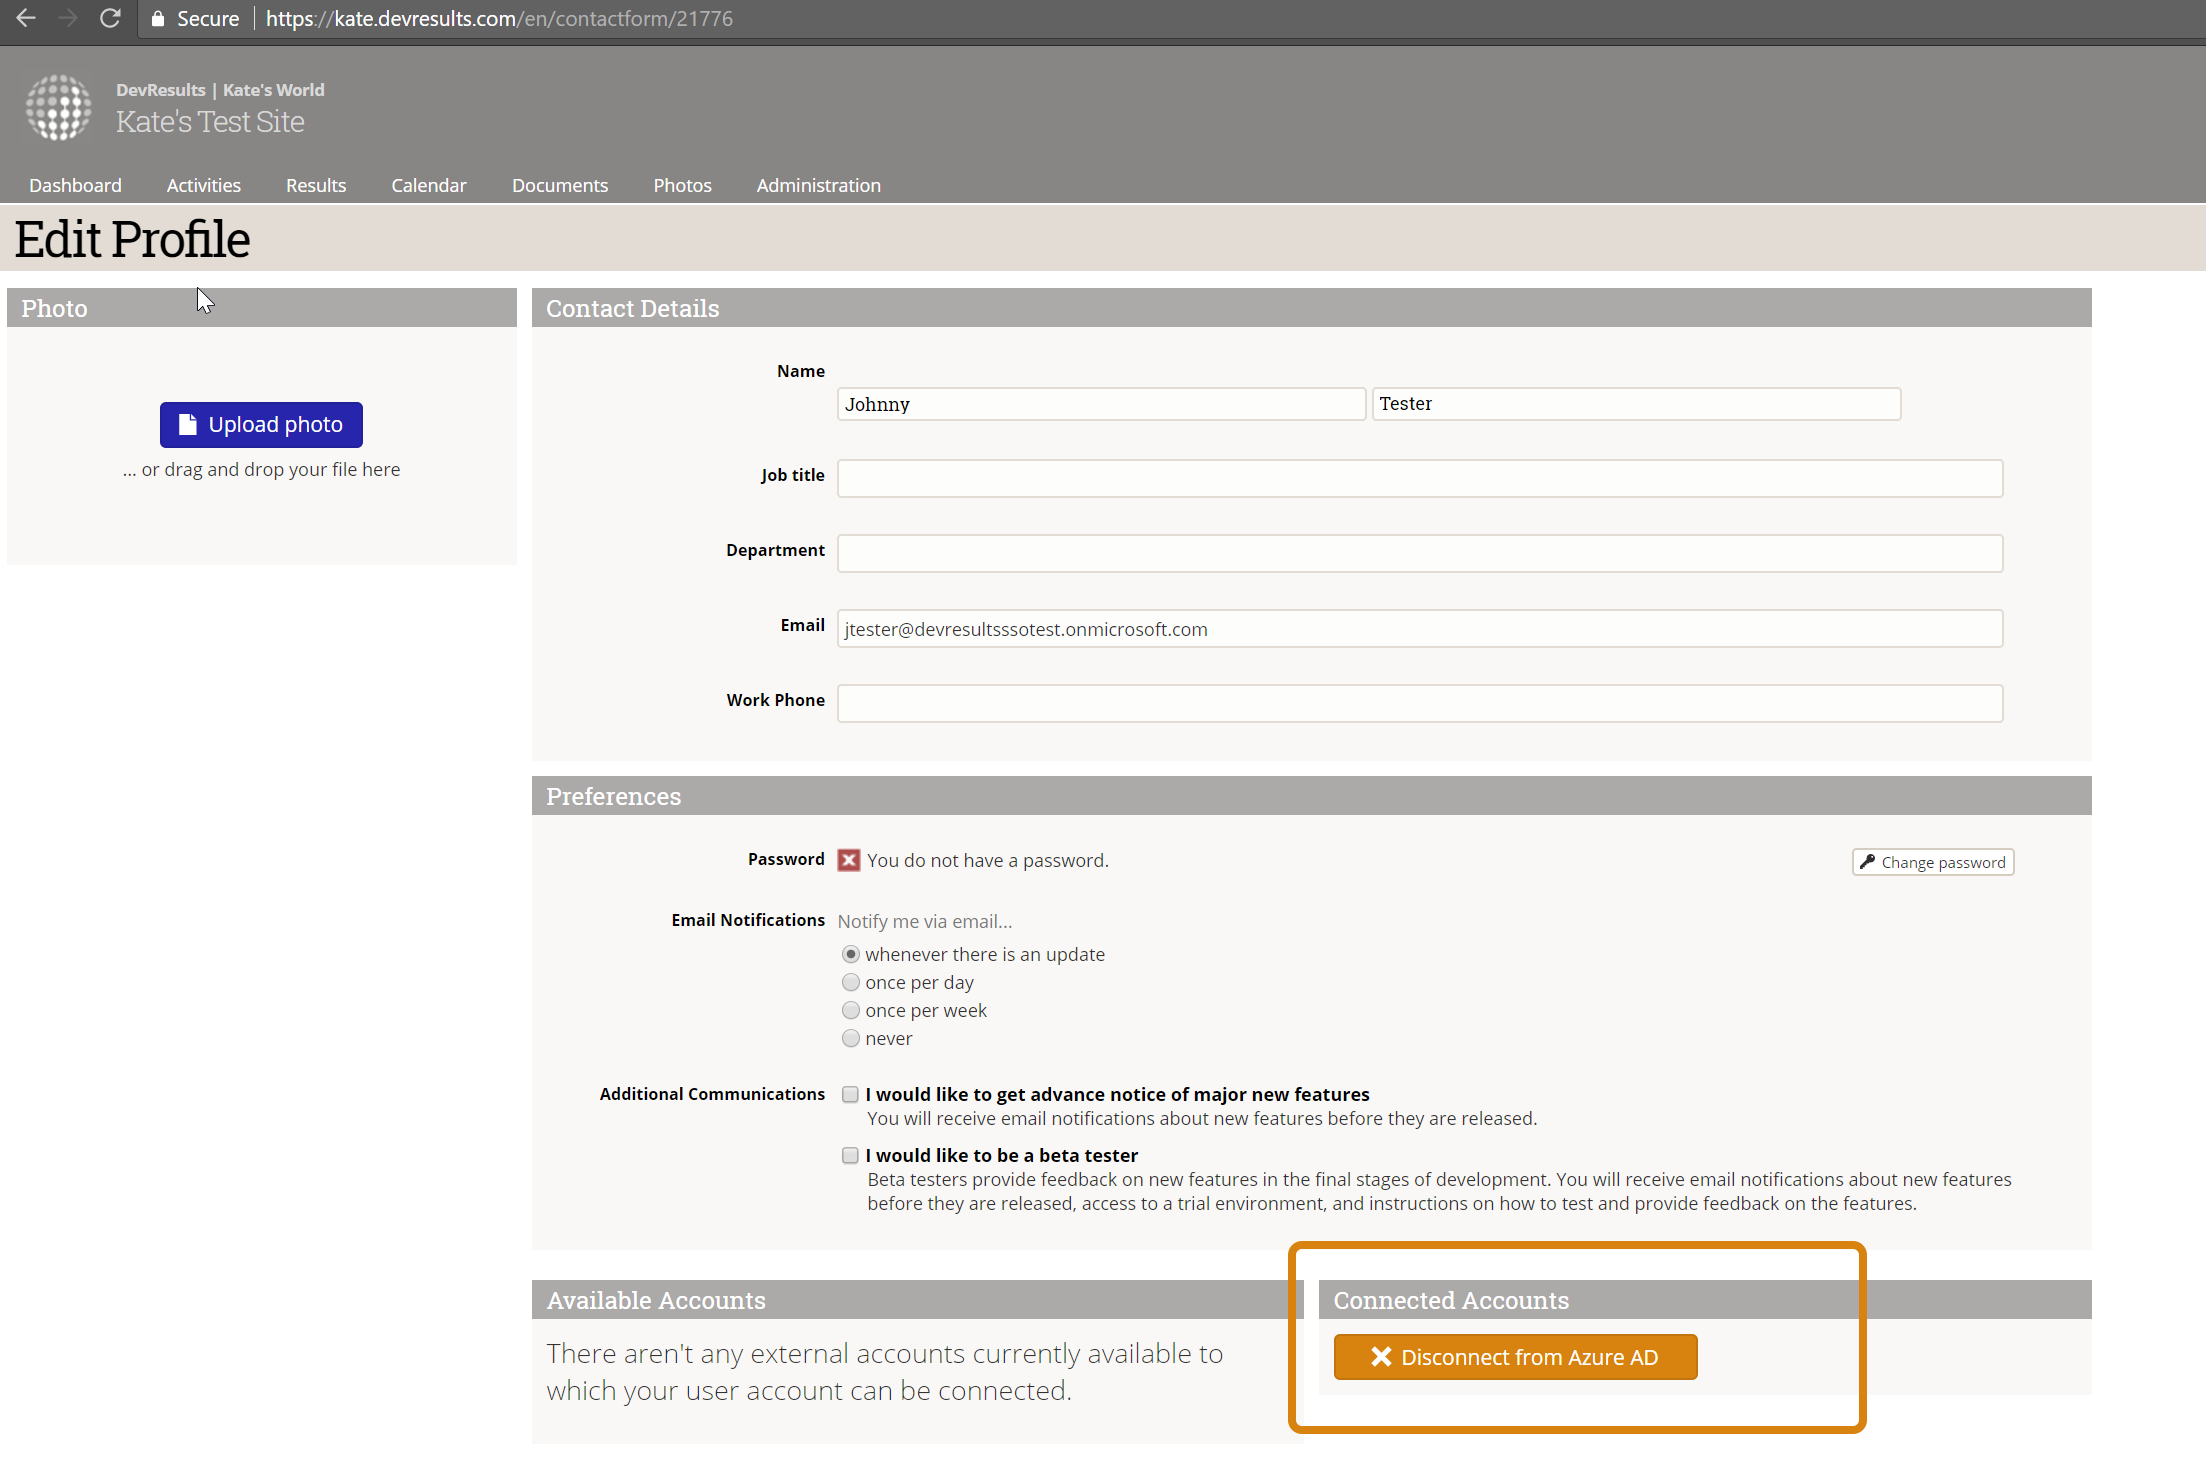
You can disconnect this relationship by clicking the Disconnect from... button here.
If you're a site administrator and you'd like to be able to see a list of users and whether they're using a connected SSO account or not, let us know--we'll be happy to create a custom query that meets your needs.
I already had a DevResults user account before we added SSO. Can I link those accounts somehow?
Individual users can link their DevResults account to an Active Directory account, provided the email addressees are the same.
Click on your profile picture in the upper right and select Edit Profile.
If you don't currently have an Active Directory account linked to your DevResults account, you'll have nothing in the Connected Accounts section and the Available Accounts section will have a Connect to {Name} button.
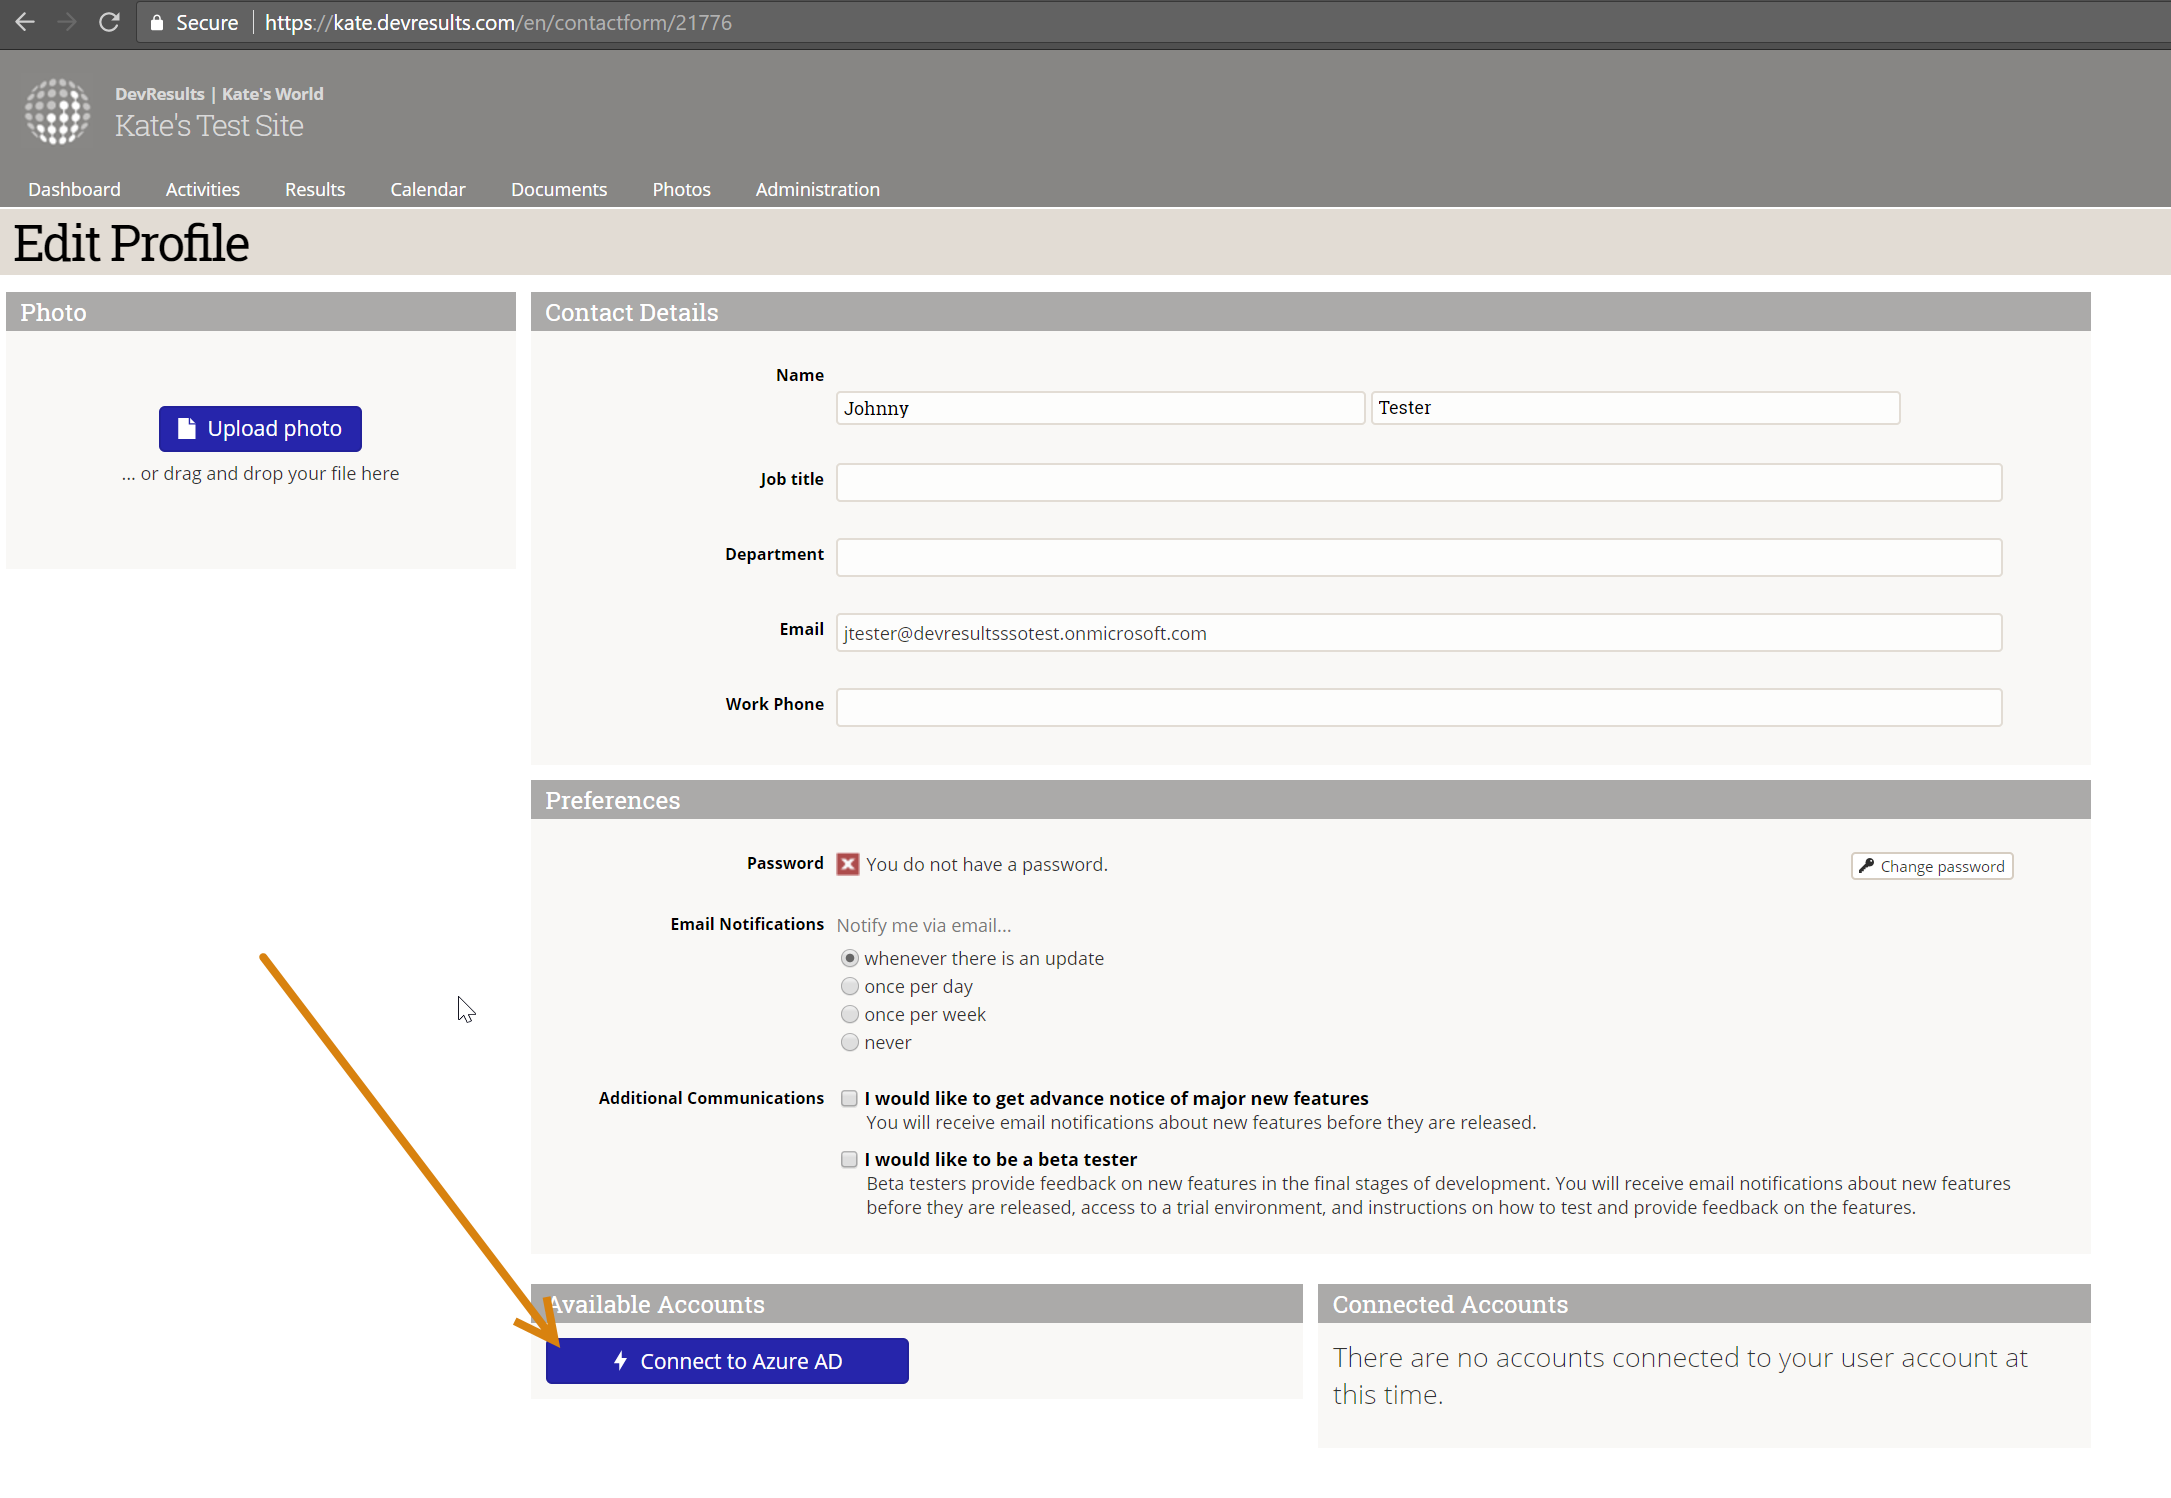
Clicking that button will take you to the Microsoft login screen where you can enter their Active Directory credentials and grant DevResults permission to use them. Once you've done this, moving forward you'll click the Use my {SSO} account when you go to log into DevResults.
How do I configure my SSO on the training site after it has been refreshed with data from my live site?
Our training site refresh entails taking a copy of your live DevResults site every month and overwriting the training site with this copy. This includes all SSO configurations. There are a few different options for ensuring that the training site remains properly configured with your SSO after the refresh:
- Manually updating the redirect URI in your SSO application once a new one has been generated on the DevResults training site.
Depending on your SSO protocol, you could automate this process by either:
- Configuring two single-sign on providers on the live DevResults site, one for the live site and one for the training site.
- Set this up exactly the same as the instructions above, just make sure to clearly label which authentication provider is for your training site, and which one is for your live site.

- Update the Redirect URI in your SSO application with the URI generated by the new authentication provider.
- The system will then automatically carry over this new configuration to the training site once the training site is refreshed, and you should be able to log on without needing to reconfigure things on your end every month.
- Users will see two log in options on both sites, and can click on the button associated with the site they want to log in on.

- NOTE: We highly recommend setting this up right before the first Friday of a month to ensure users can log into both live and training sites seamlessly.
- Set this up exactly the same as the instructions above, just make sure to clearly label which authentication provider is for your training site, and which one is for your live site.
- If your SSO provider allows you to do so, you only need to provide your SSO application with two "Sign-in redirect URIs," one that has <your- site>.devresults.com as the host and one that has <your-site>.training-devresults.com as the host. The protocol and path should be the same for both.
- If you'd like to have different groups of people have access to training and live sites, use a separate SSO provider/application, or just have different settings between training and production, the solution is a bit more complicated. One solution would be to use the DevResults API to re-create the login settings on the training site after the refresh completes. The general idea is as follows:
- Create an API Key with Owner permissions on the production site (this way it is always present in training after the refresh)
- After the training refresh, use the API key to delete the live site login and re-create the training site login
- On the SSO provider side, you can either use a wildcard in the "Sign-in redirect URI" to handle the fact that the number path may change over time, or you can update the SSO app with the correct URI after creating the settings on the DevResults side.


How do I update my SSO certificate when my previous one expires ?
Once you have a new certificate, log in to your DevResults site and navigate to the Settings page. Open your existing single-sign on provider

Delete the current Secret and replace it with the new one.
back to top
Didn't answer your question? Please email us at help@devresults.com.